Hey all,I've been a semi-lurker here for a long time but think I'm far along enough now in my build to do some sharing.This is going to be a fairly long,rambling & pic-heavy post,so I promise I'm not spamming- there's just a lot to show & tell you all,at long last!
So,fifteen months ago,at the start of the first lockdown here in the UK,I started taking a few baby steps into machining.I work in manufacturing for a company that makes safety equipment,so we have a full machine shop,press shop & tool room- the latter being where I do my experiments.
These are the two machines I have exclusively been using:
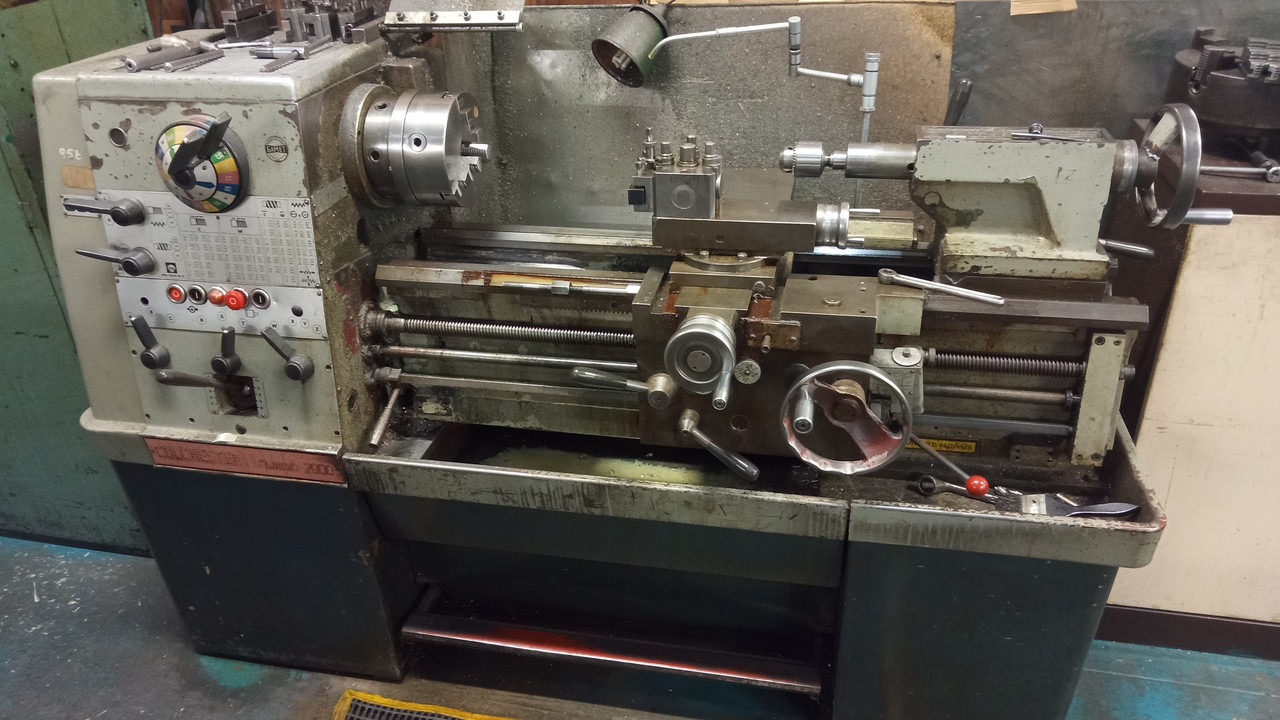
A Colchester Triumph 2000 manual lathe...

...& a trusty Bridgeport miller.
I haven't stuck these on the Small Machining pages as they definitely are not of the small variety!
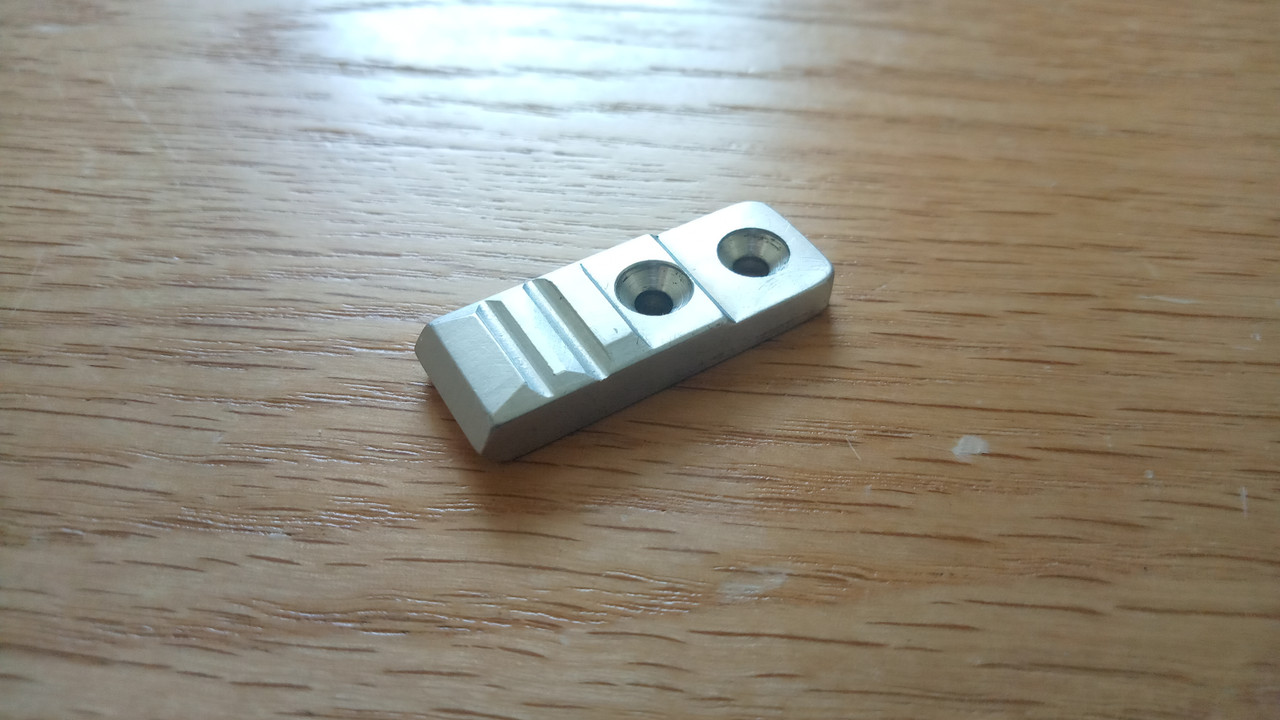
So I did some inital turning just to see if I could get a feel for it,& kind of found my way to making this:

Huh.
Looked kind of like an emitter...🤔
So of course I decided to aim way above my skill level,& try to make my first lightsaber.😅
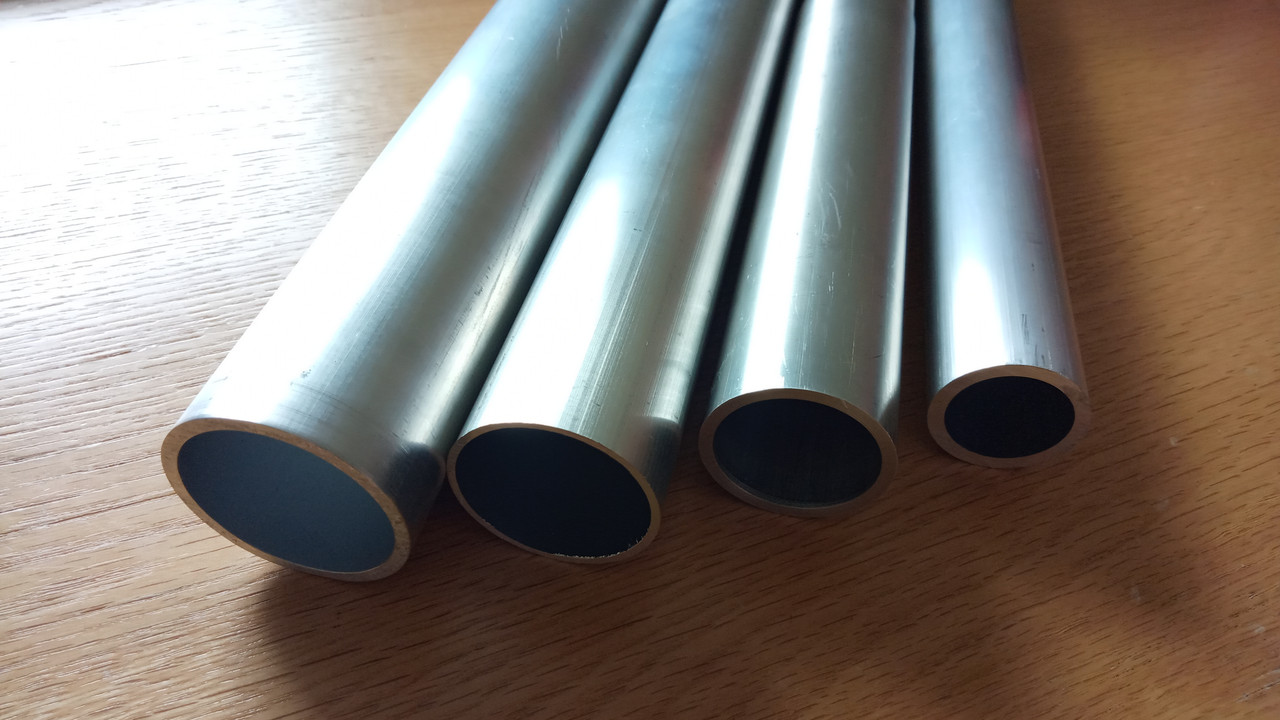
I used some scrap offcuts of aluminium lying around in the bins at work at first,but then started sourcing some sizes from eBay that actually fitted over each other (OD meeting ID or close enough to turn it to suit,etc):
But what shape or style of hilt to attempt?Well,for several years now,I've had a bit of a visual obsession with one particular design:
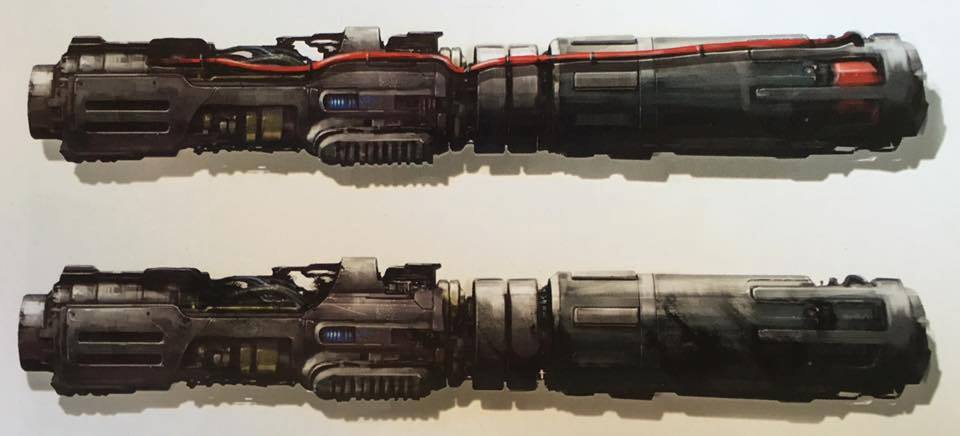
The Jedi Killer.
Like several folks out there,I fell for it completely.Its grungy,aged,hacked look just grabbed me; these were the days before the release of TFA remember,so at that point we just didn't know who Kylo was going to turn out to be (yeah,let's not even get started),& this saber spoke to me of an old Sith relic,maybe from an ancient tomb on a dead world that someone probably shouldn't have been delving into or somesuch...
Yes.One of many storytelling opportunities totally overlooked in that new trilogy.😠
Now,I was hugely inspired by the versions of this hilt that had got out there already on the forums.Snilam of Force Foundry made a stunning pair,& these were the first I saw when stumbling across his forum posts & on YouTube.Our very own Jediseth has built a beautifully brutish couple of takes on this concept; Harp's was just an insane tour de force of internal & external engineering; & then of course there was Phoenix Props' gorgeous run last year.
I can never compete with any of these guys; everybody's work in this hobby just blows me away.But,I wanted to try it myself regardless,as of course you're never really a true Jedi or Sith until you've built your own saber,right?😅
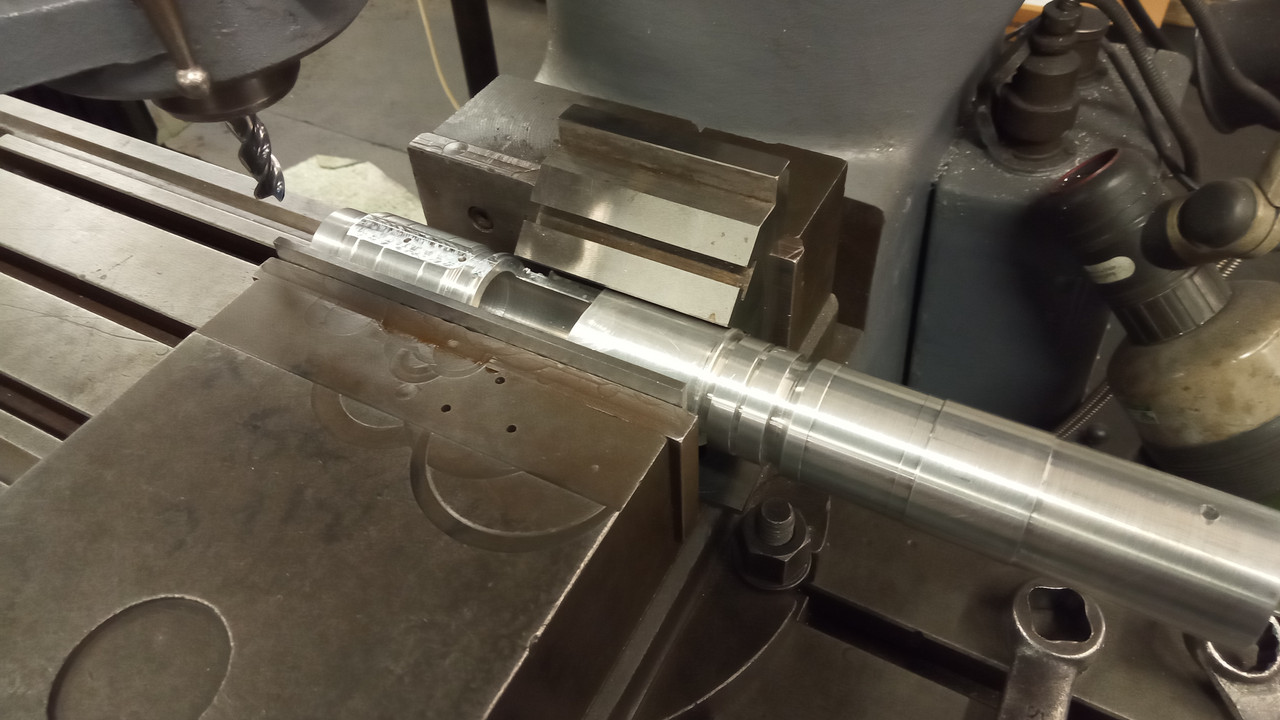
So I started shaping in the lathe (yes,machinists are going to see setups that make them cringe- I was just learning,with minimal tutoring & also just around the edges of work,which is when & where I've done 99% of this):
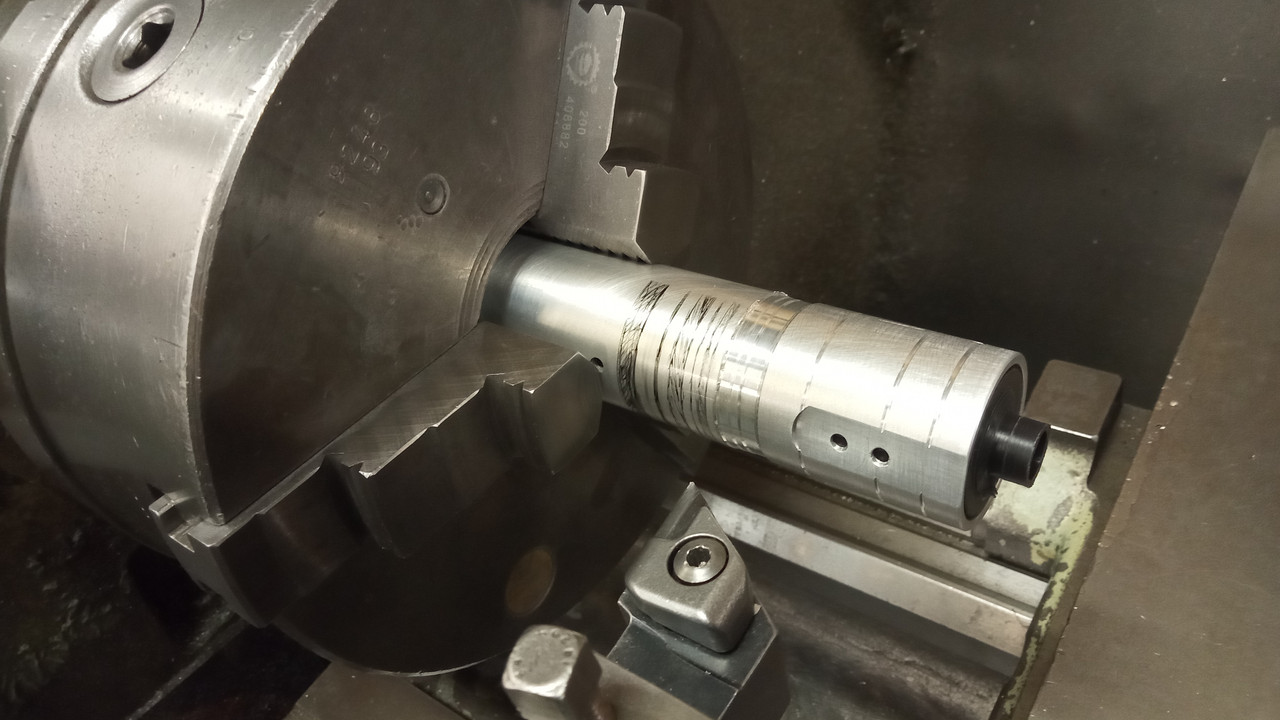
The black material inside the tube is a Delrin support that I turned to fit- this was a technique I cannot shout enough about to anyone working on material with a thinnish sidewall,Delrin is quick & easy to shape & the benefits of support material are beyond valuable.
Alarm bells:
A few weeks in I suffered a VERY close shave with the lathe.If I use the words "glove" & "long loop of emery cloth",our experienced machinists will be screaming at my stupidity.Now I'm no kid apprentice; I'm a 45-year-old experienced mannufacturing worker,but I approached the job in a way I thought was common sense but was actually closer to machine suicide.I was uneducated,extremely lucky,& I got away with only minor surface injury,so it was... a learning experience that woke me up out of the onset of any lax familiarity I'd started to feel with the lathe.Machines want to kill you if you do not respect them enough,or ask enough questions about your setup.Yikes.🤦🏼♂️
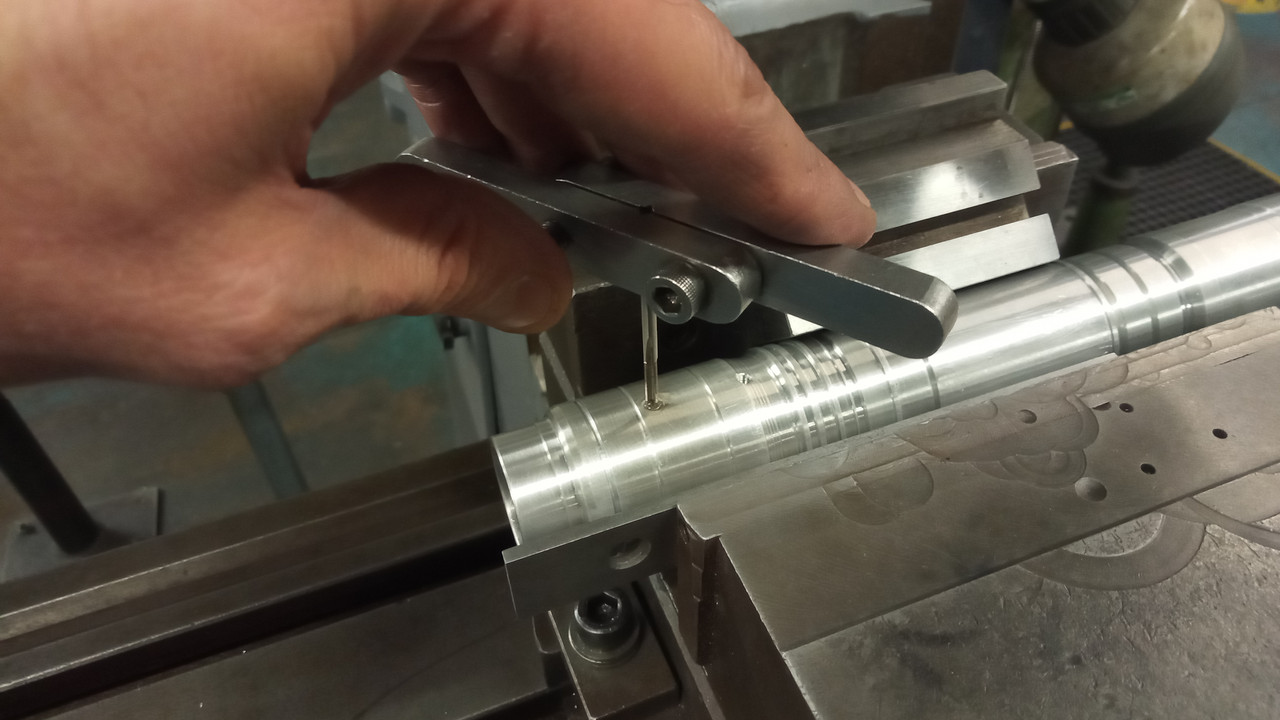
So taking the entire horror experience on board,& seeking a ton more advice before making a single cut,like I should have,I moved to a far better setup which revolutionised the cuts I was able to take:

Coolant is invaluable for surface finish.Cuts can still go wrong,but makes a world of difference,& having a circulating system on the lathe is super useful.
So after some turning,I decided to move on to the Bridgeport to have my first bash at the complex outer shroud:
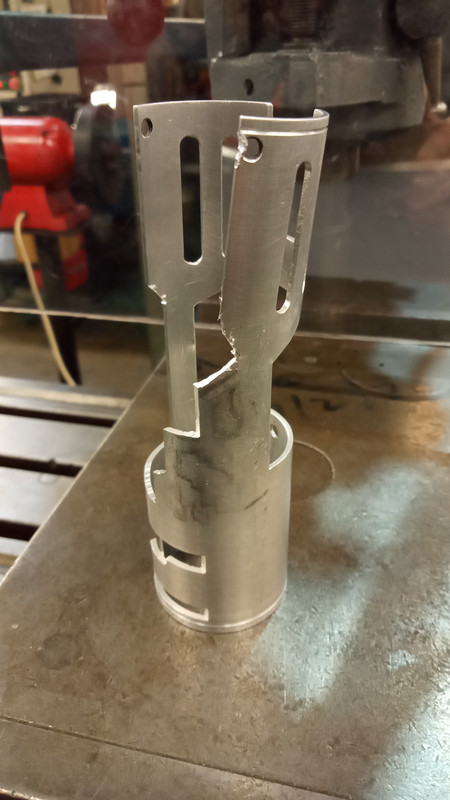
...& this happened.🤦🏼♂️
My own bad setup is to blame for most missteps you're going to witness here.I went for that one last cut of the day with the shroud clamped at an unlikely angle,& the end mill just ripped it out of the vice.Argh!
So on some sound advice from a mentor,this time turning a Delrin support "rod" to prevent the shroud from popping out of the miller again,I tried again:

Much more solid & productive cuts.So I then moved on to trying to make some of the surface embellishments & greeblies of the Jedi Killer's design:
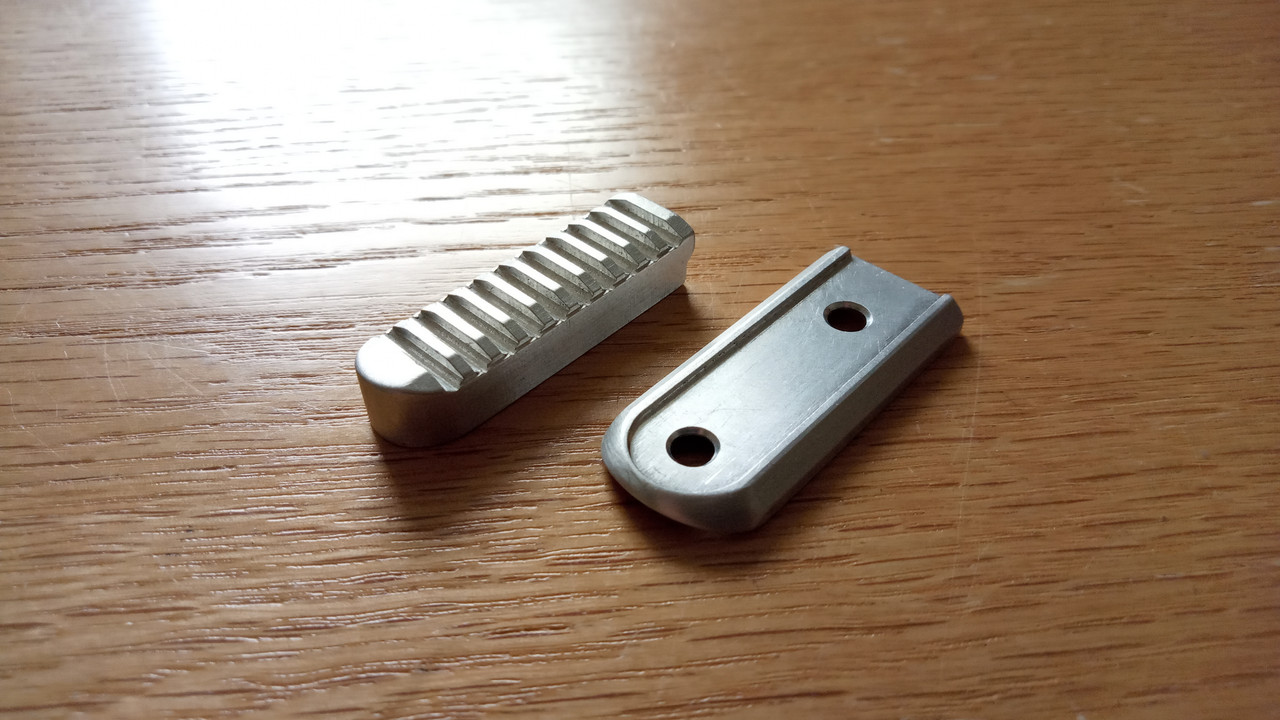
This was attempt number 1 at the "sight" panel that sits atop the emitter.After some detailing,came out thus:
Not too bad for a first run at it,but needed work.Here it is test fitted onto my v1 hilt,with shroud v2 in place:

I initially decided to go with M4 thread retention screws throughout to keep it simple,but I later amended this to a mix of M3 & M4 depending on the application- sometimes,you just don't want the screws to be that obvious.
Using a guage of tubing that would fit onto the OD of the shroud beneath,I began work on the mount for the side vent box:
The vent box itself was simply a block of aluminium I cut to approximate size,then detailed using a tiny 2mm centre drill to cut the vents (one of many great tips from one of my genius mentors at work).Here's how they turned out (pretty successfully,to my surprise- I was beginning to enjoy the Bridgeport):
Like a glove,phew!
So I wanted to attach it to the shroud with grub screws.I'm not a fan of adhesive solutions when a mechanical one is possible,so I drilled & internally countersunk the shroud:

I drilled & tapped a couple of blind holes into the inside face of the vent box,& it attached thus:
Next,I tackled the switch box cover.To me,what looks like a blue illuminated switch was present on the JK concept painting,so that's where I decided my switches had to end up.Again I used a section of tube with an ID that sat on the shroud's OD,then drilled & tapped the shroud accordingly:

I also mocked up some plasticard (styrene) buttons,of approximately the shape I felt the design showed.My plan is to cast the final versions in resin:

& here the whole assembly is in place:
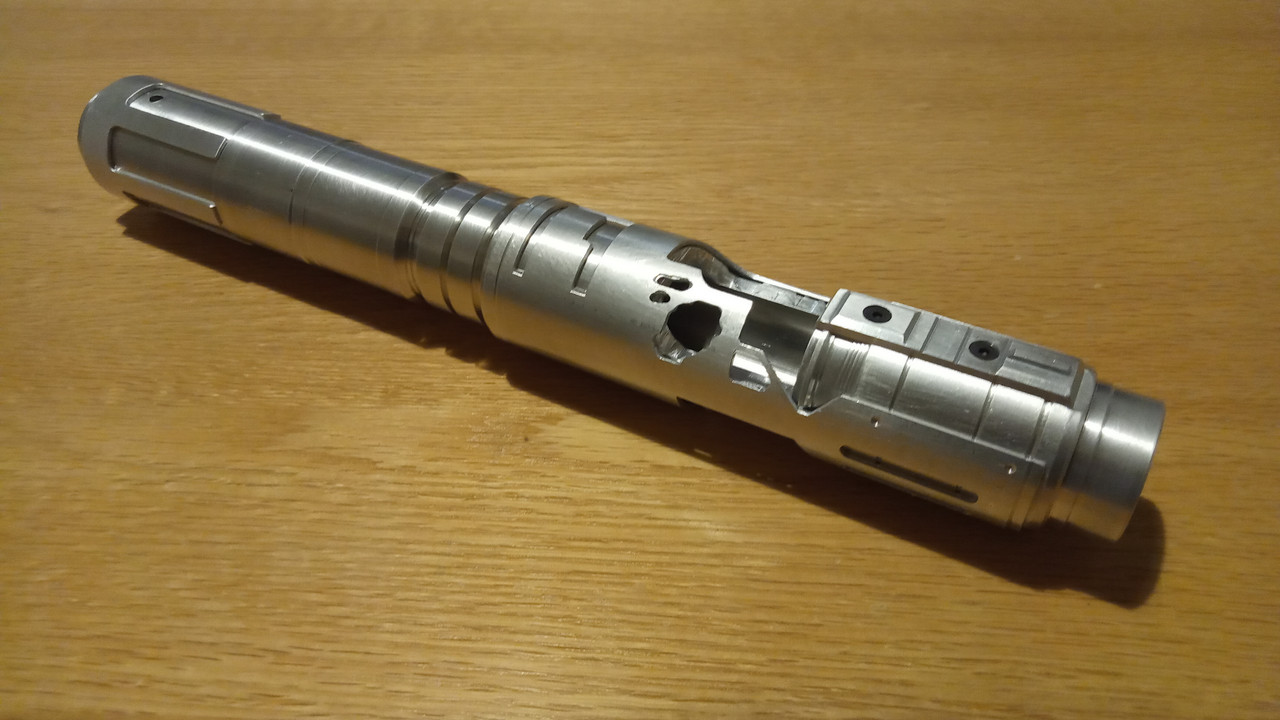
So I had realised that I couldn't achieve the design notes I wanted in the central choke section of the hilt without using a much thicker walled base tube.Threading is beyond me at this stage,ruling out a multi part construction,so a one piece main hilt with retention screws for everything was my plan.
I moved to an approximately 1"ID with 1.5" OD to see how the new detailing could look:
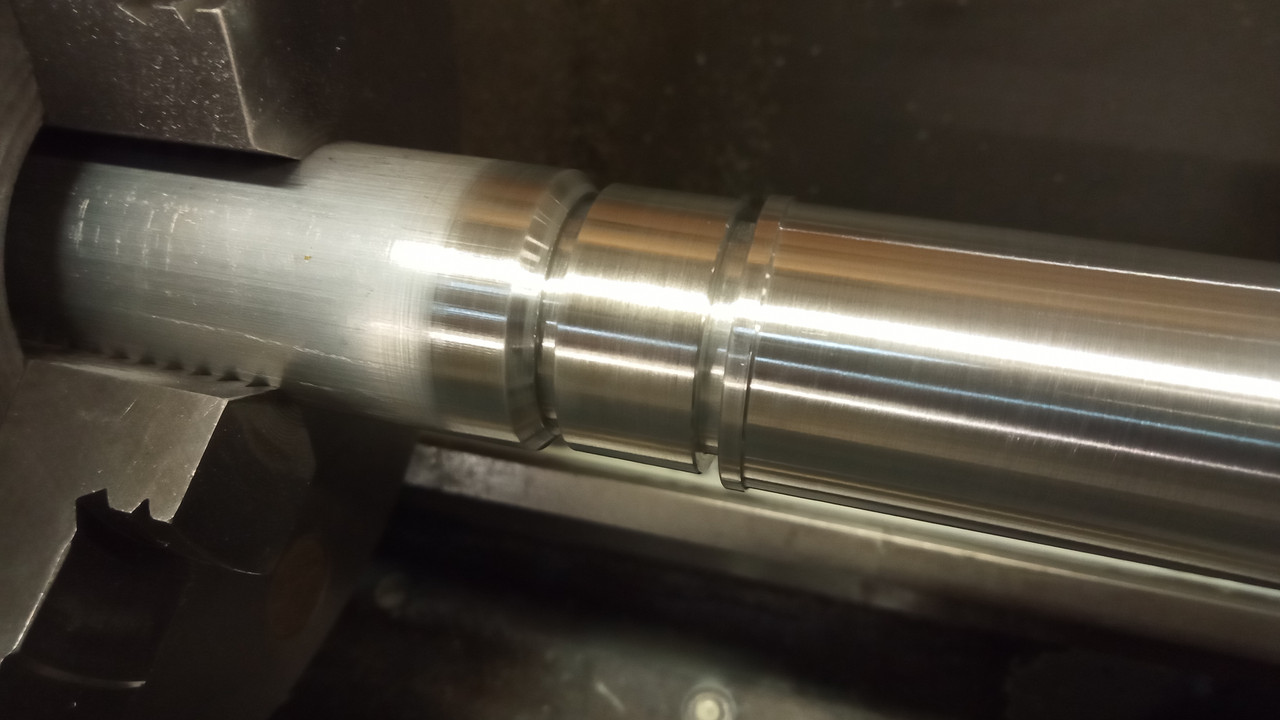
Better,I thought.But a few iterations happened at this point,as I kept miscuing on the lathe with boring the emitter ID & other things... hence ending up with a few failed main hilts.
The v4 (I think) is now my final main hilt.😅

So at some point in machining,you forget to document certain parts because you get a bit focused on the job in hand.During one of these sessions,I actually managed to make the rear cage section,using the same ID/OD fitting method as the shroud,& also made my first attempt at the pommel cap:
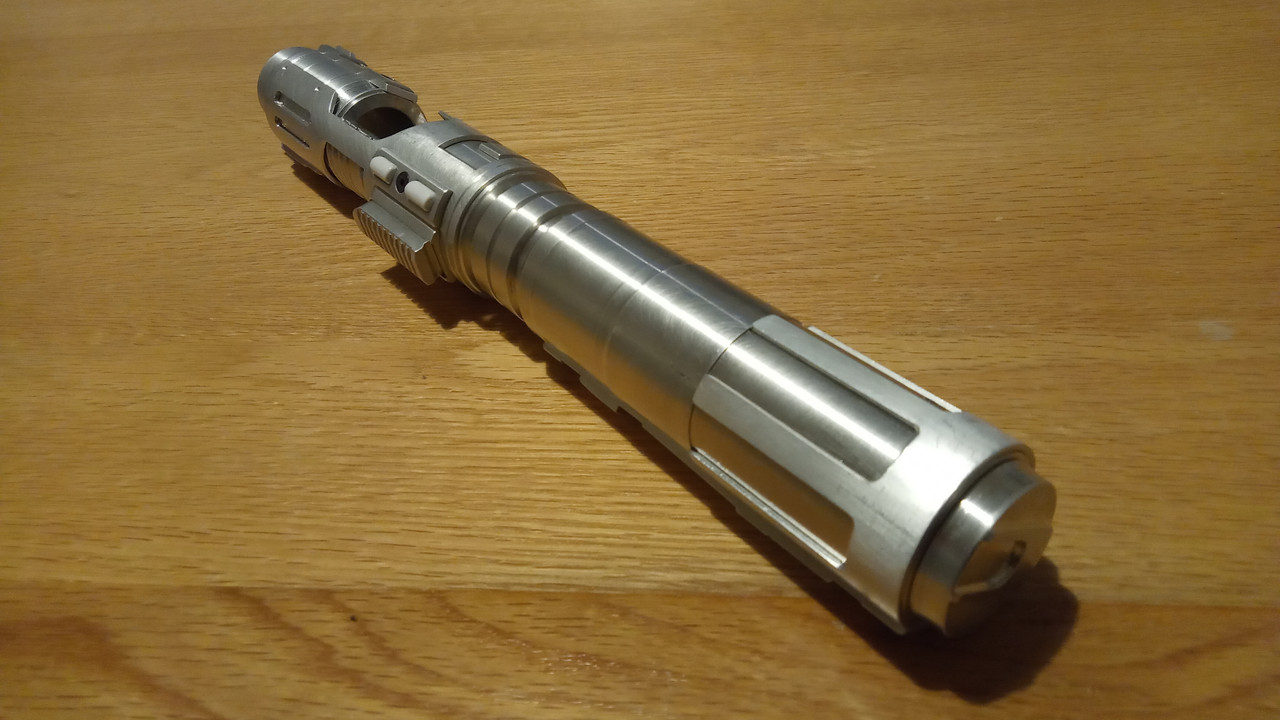
It was coming along.

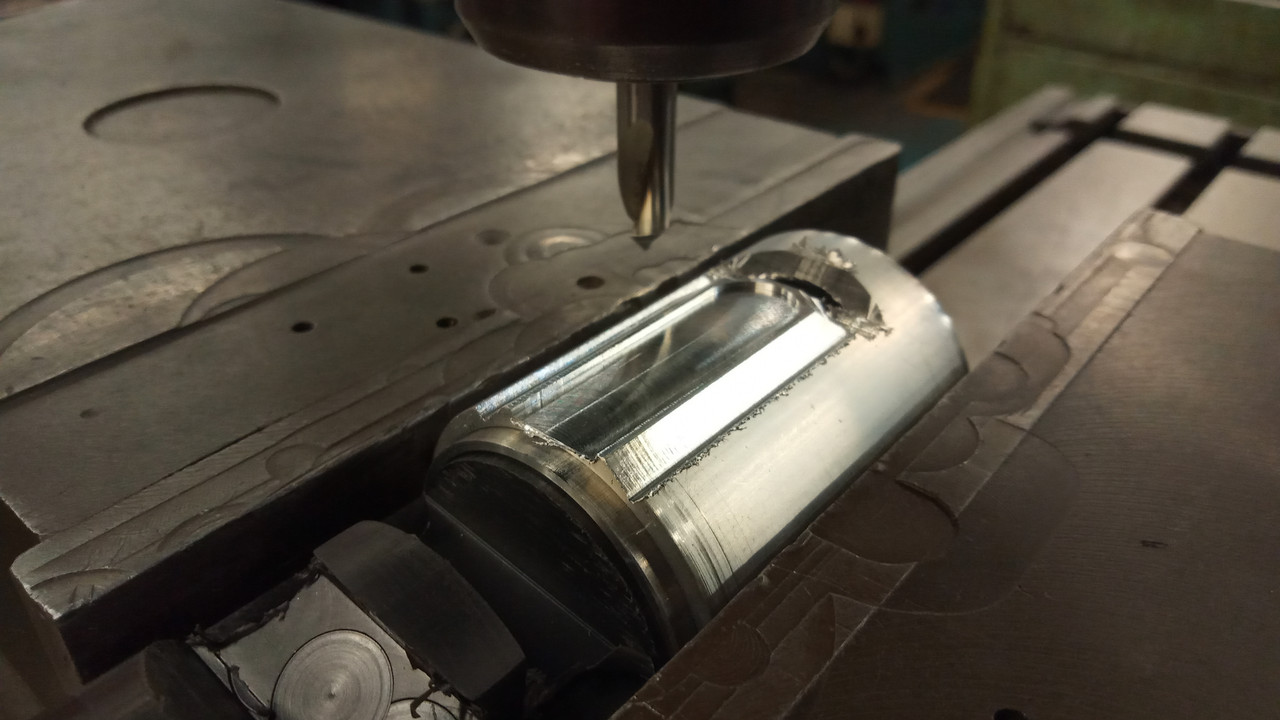
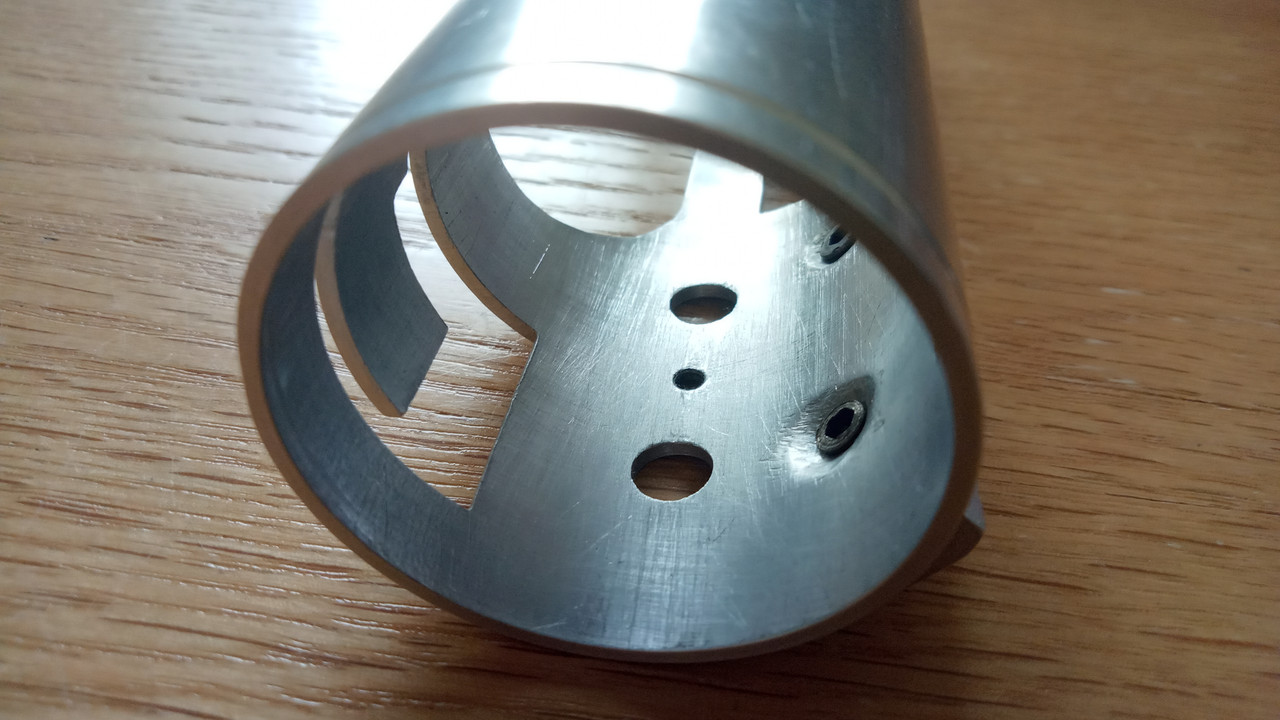
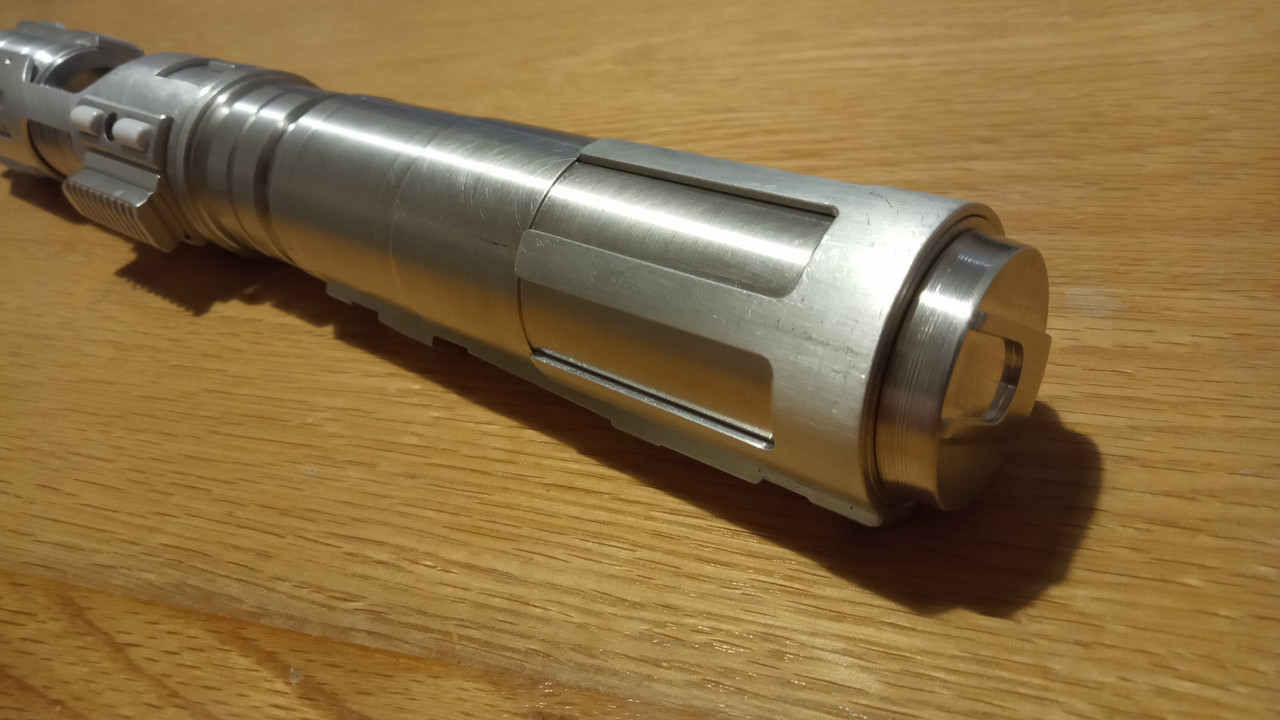
So far so OK.Then,with heart in mouth,tackled the full cutaways beneath the cage:

Test fit:

Phew.
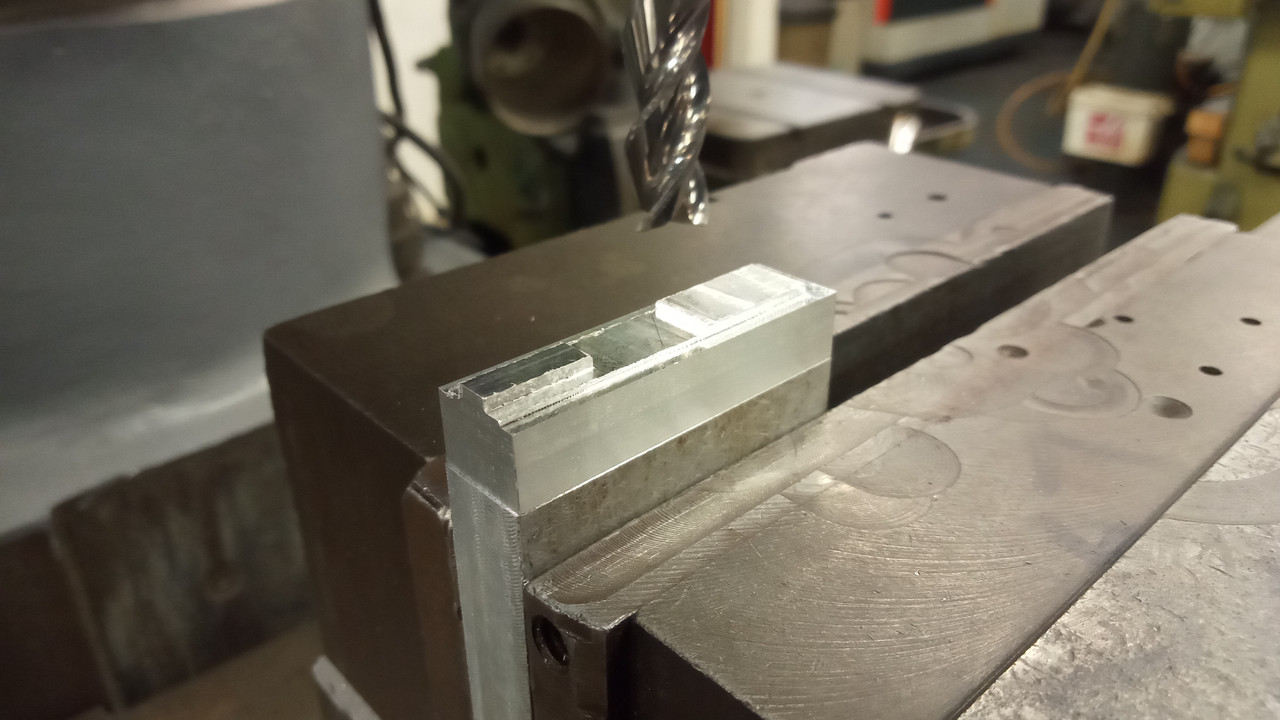
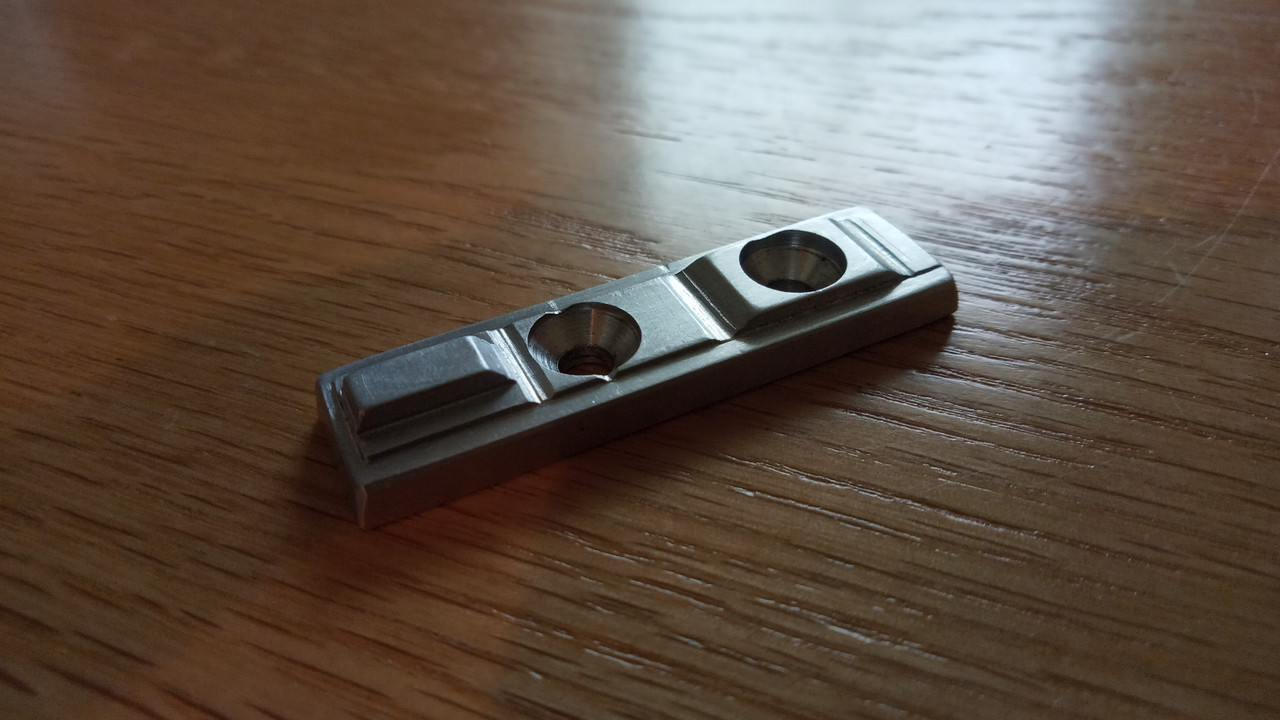
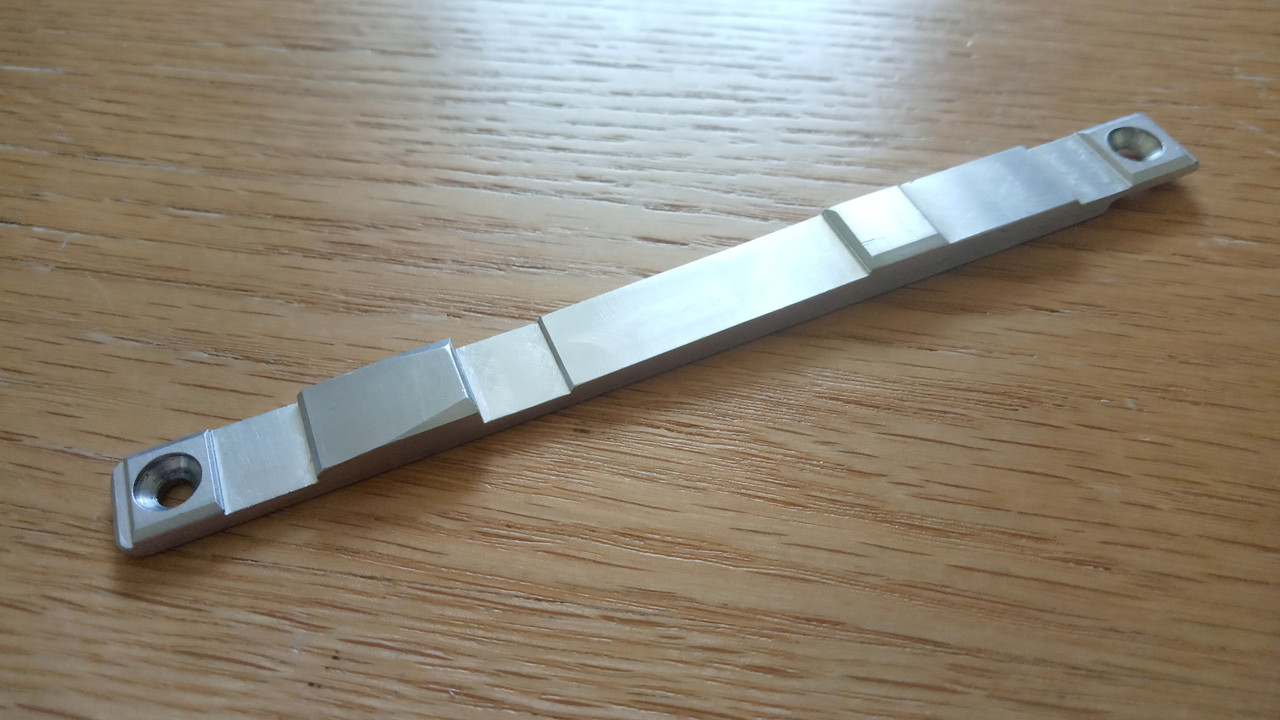
At this point I realised I had to tackle the long "spine" section or bar that runs along under the rear of the hilt.It had several iterations due to me being fussy,& here's some of the milling ops too:
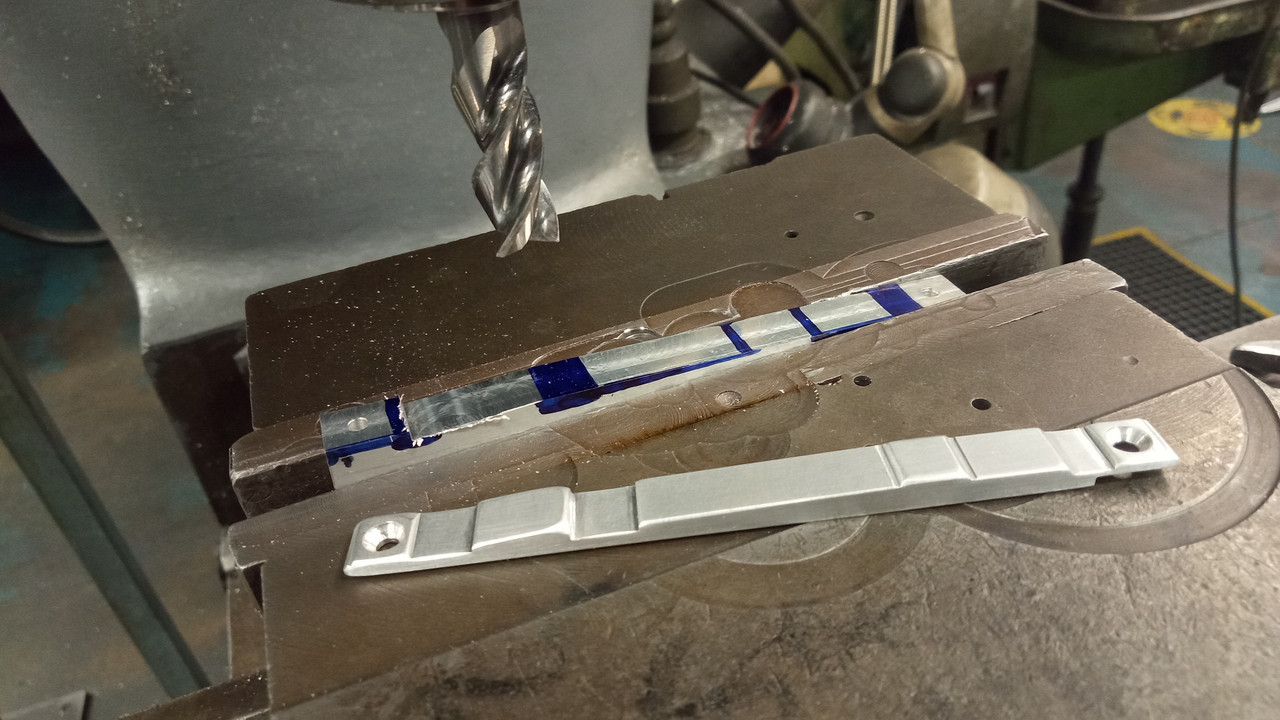
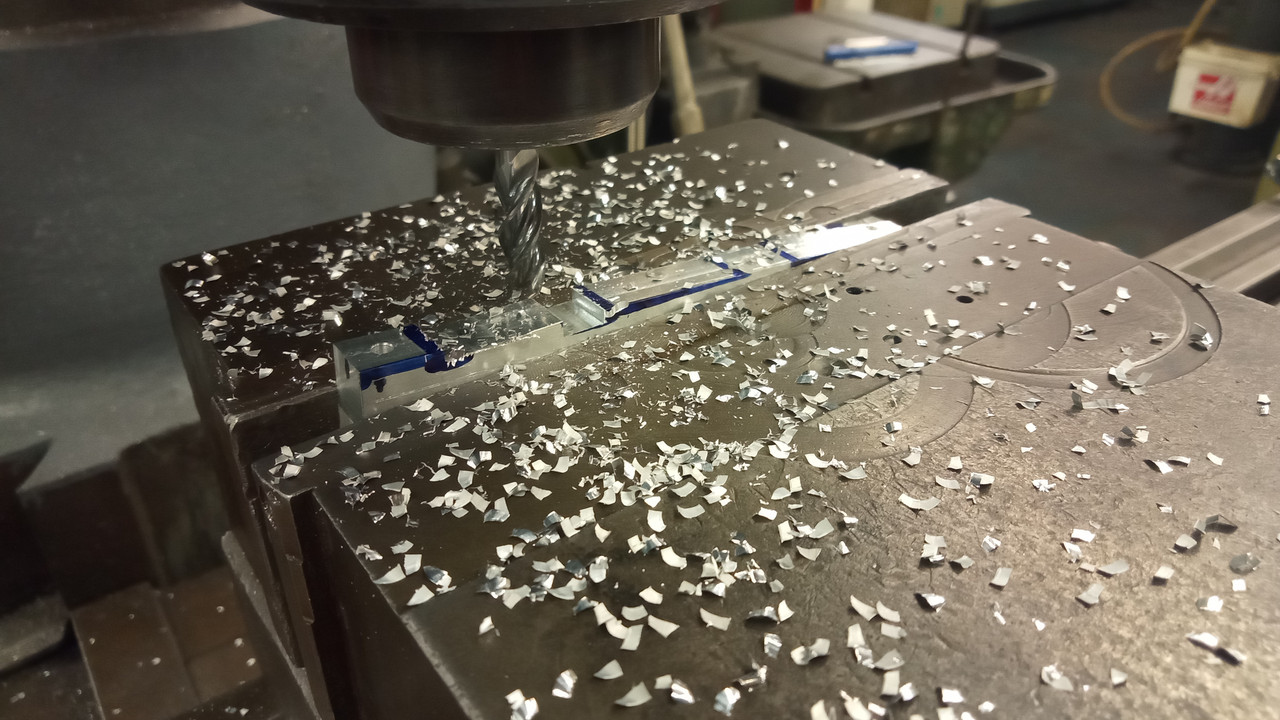
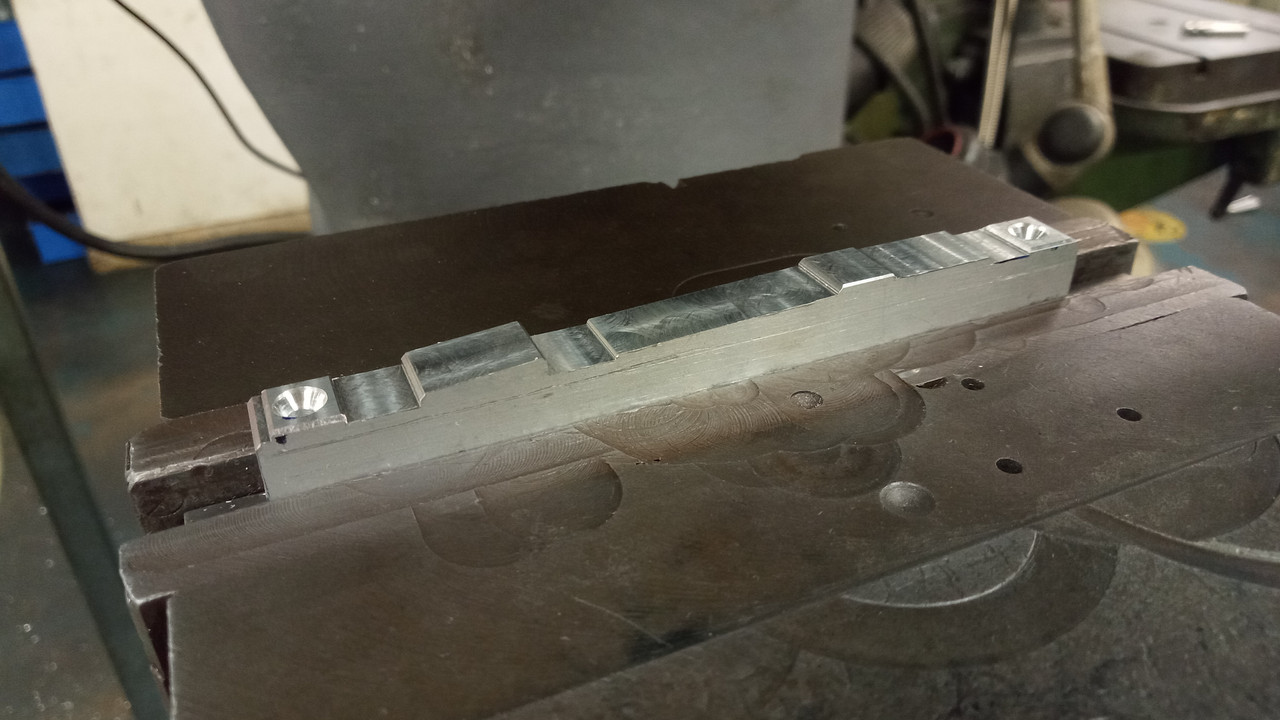
Several versions later,the spine was done.The countersunk holes in it are for the retention screws that will hold it it place:
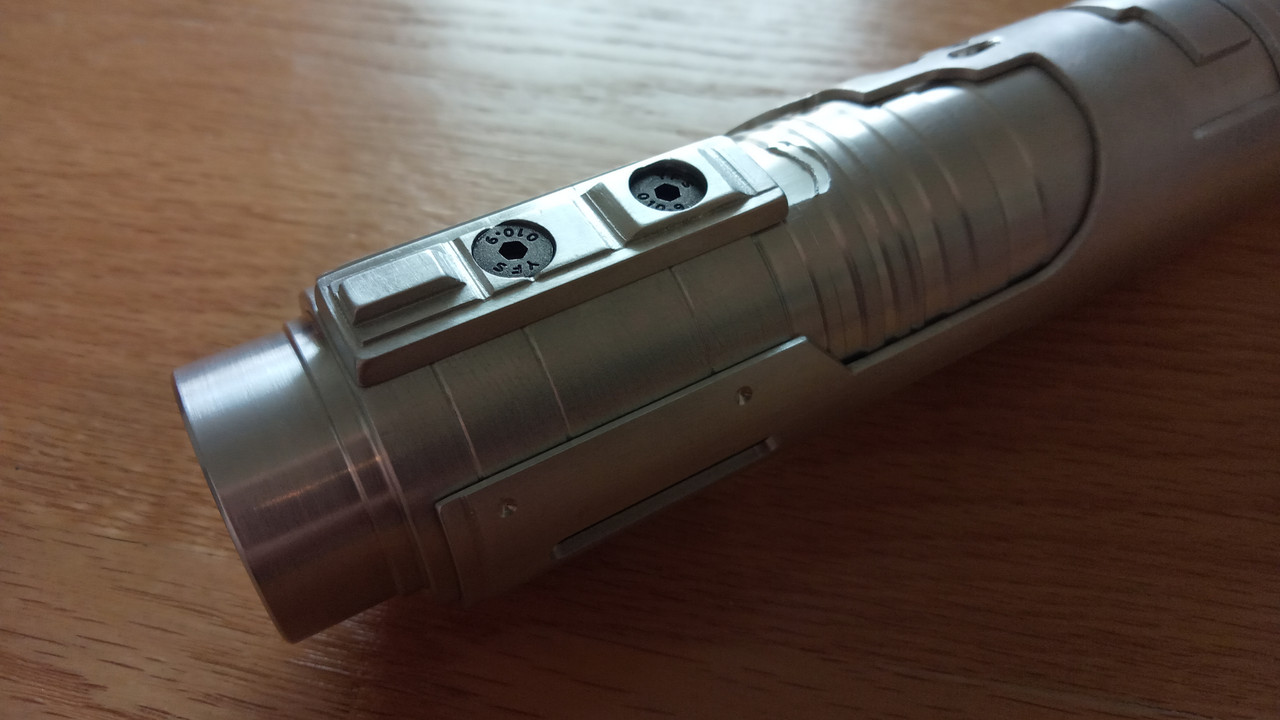
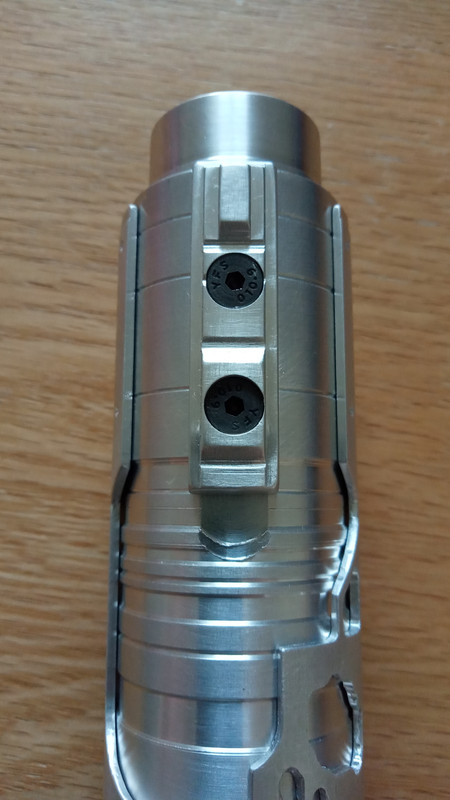
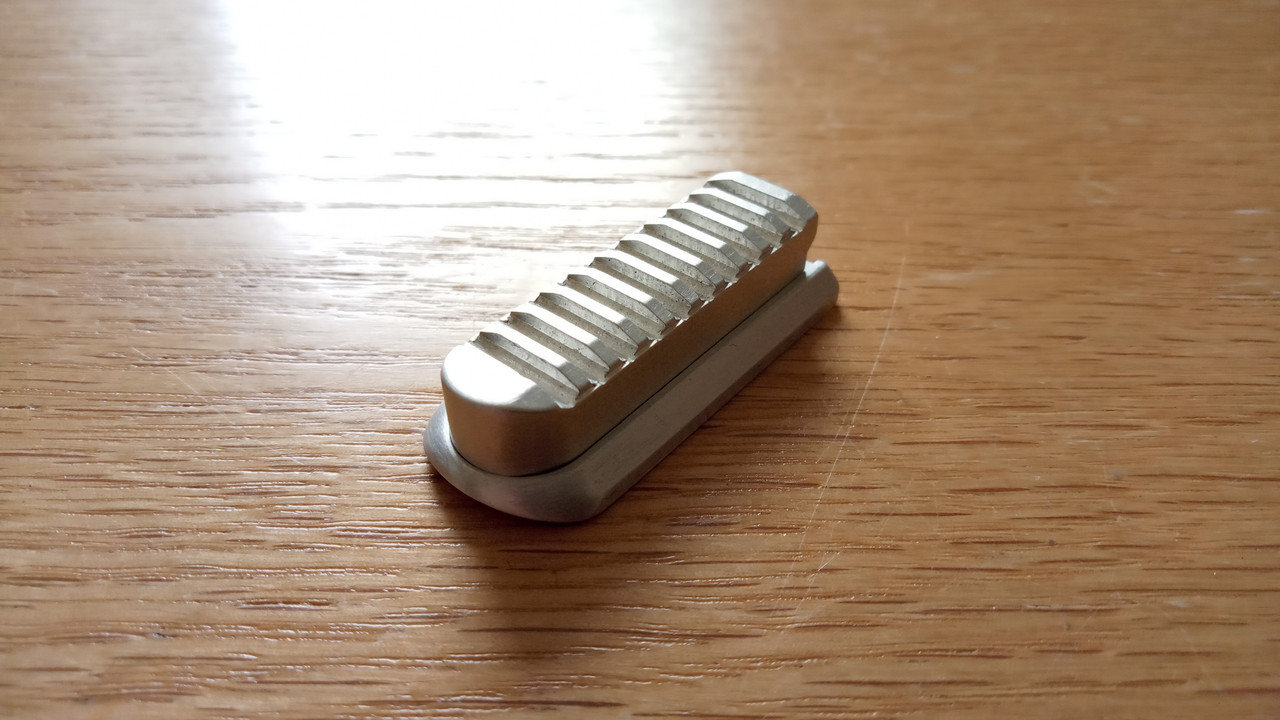
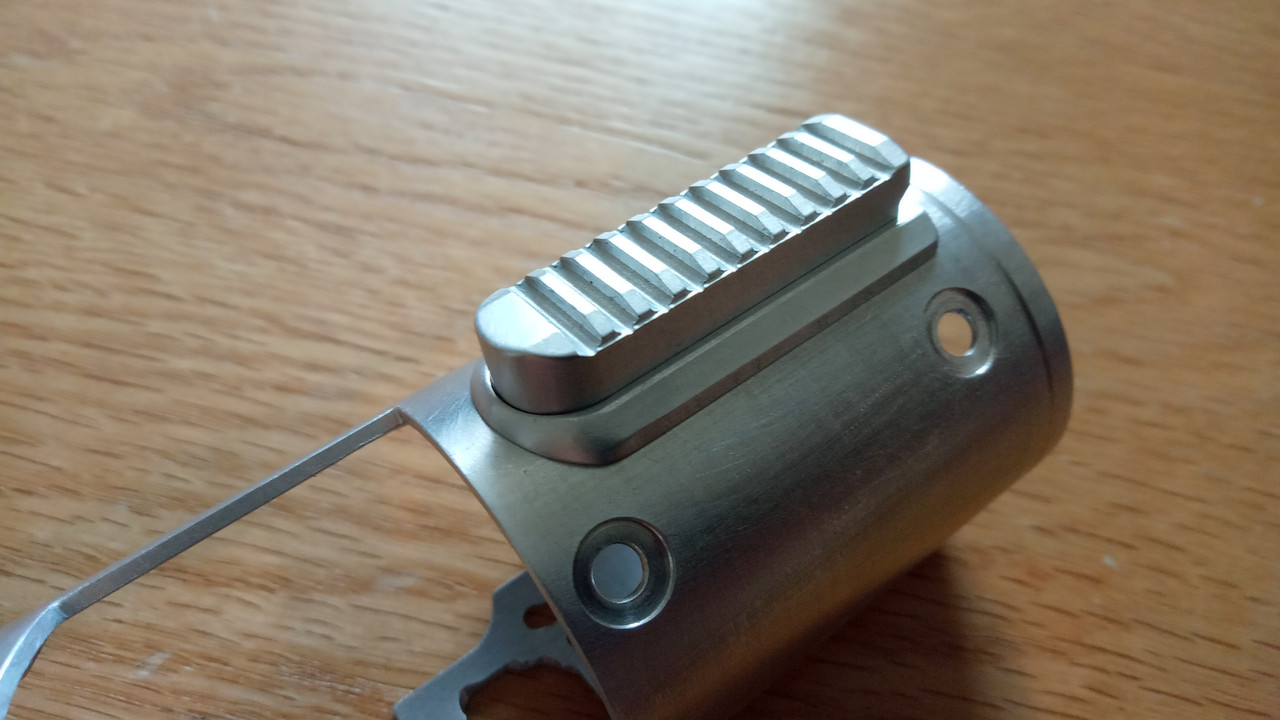
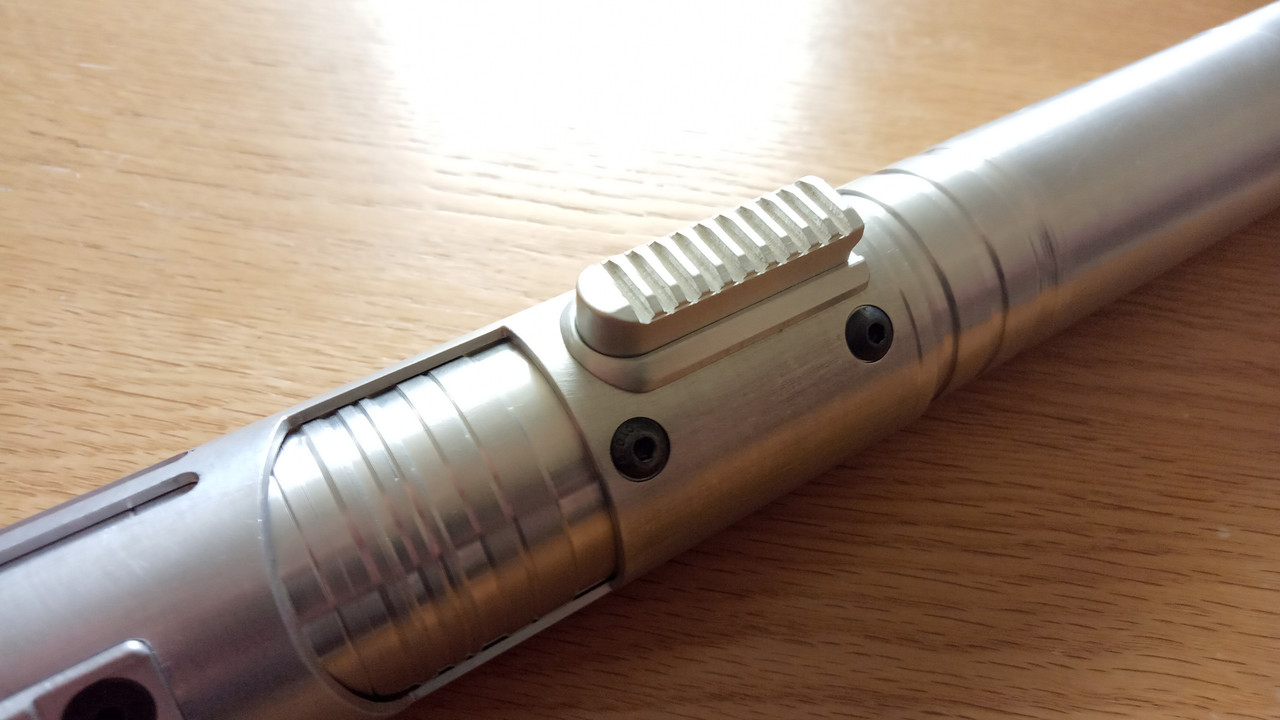
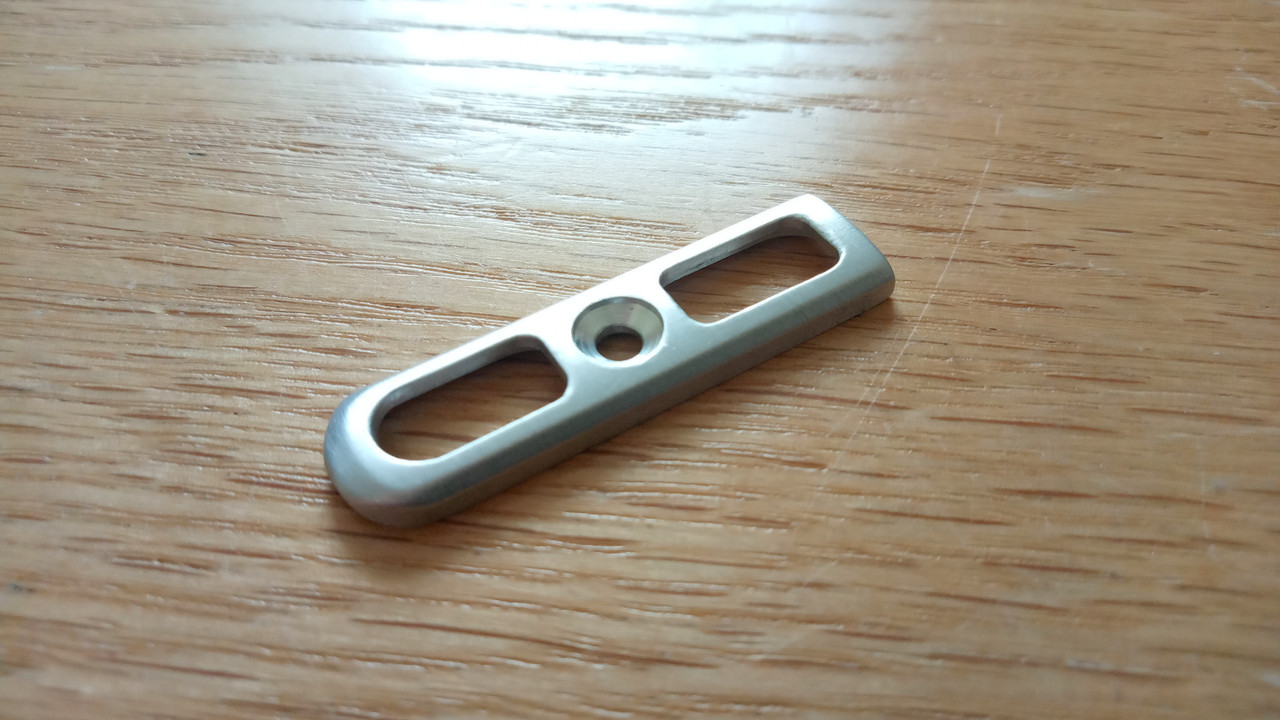
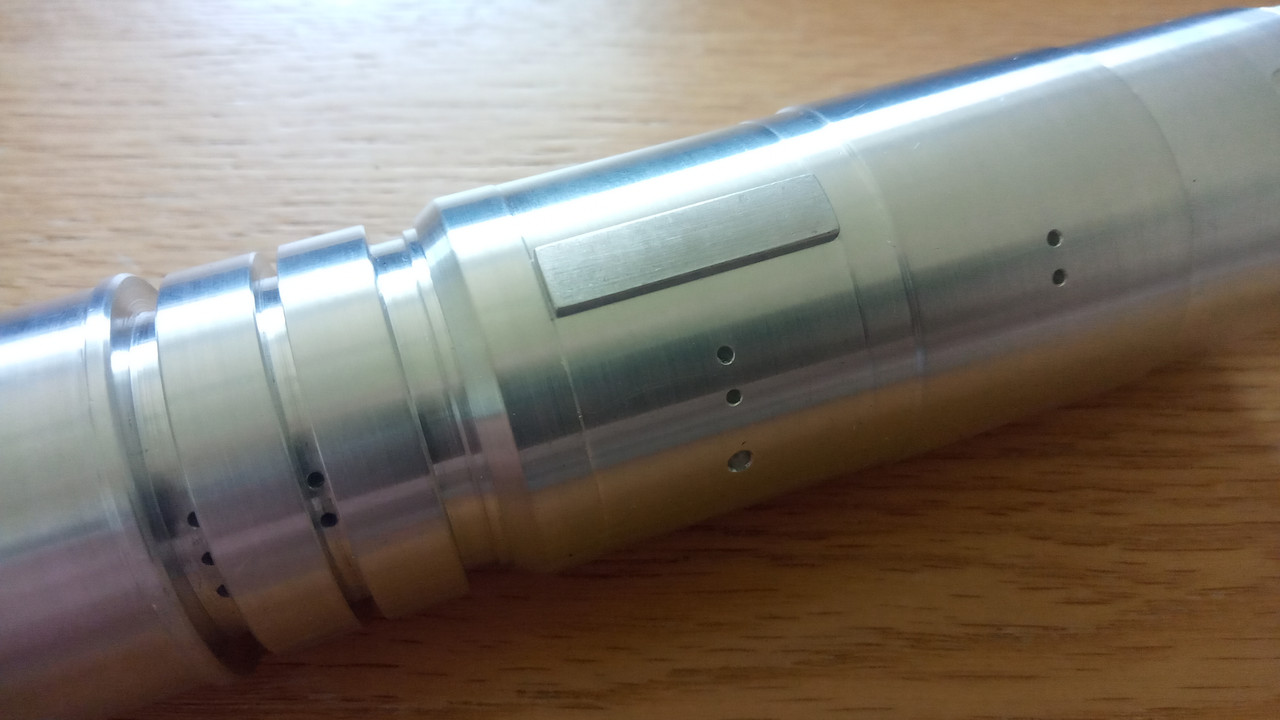
I also realised I needed to remake the top sight,just to make it tighter & more defined:


This is actually the v3 sight (I messed up another- you get the picture).I also remade a final version of the bottom "sight" that attaches under the emitter:
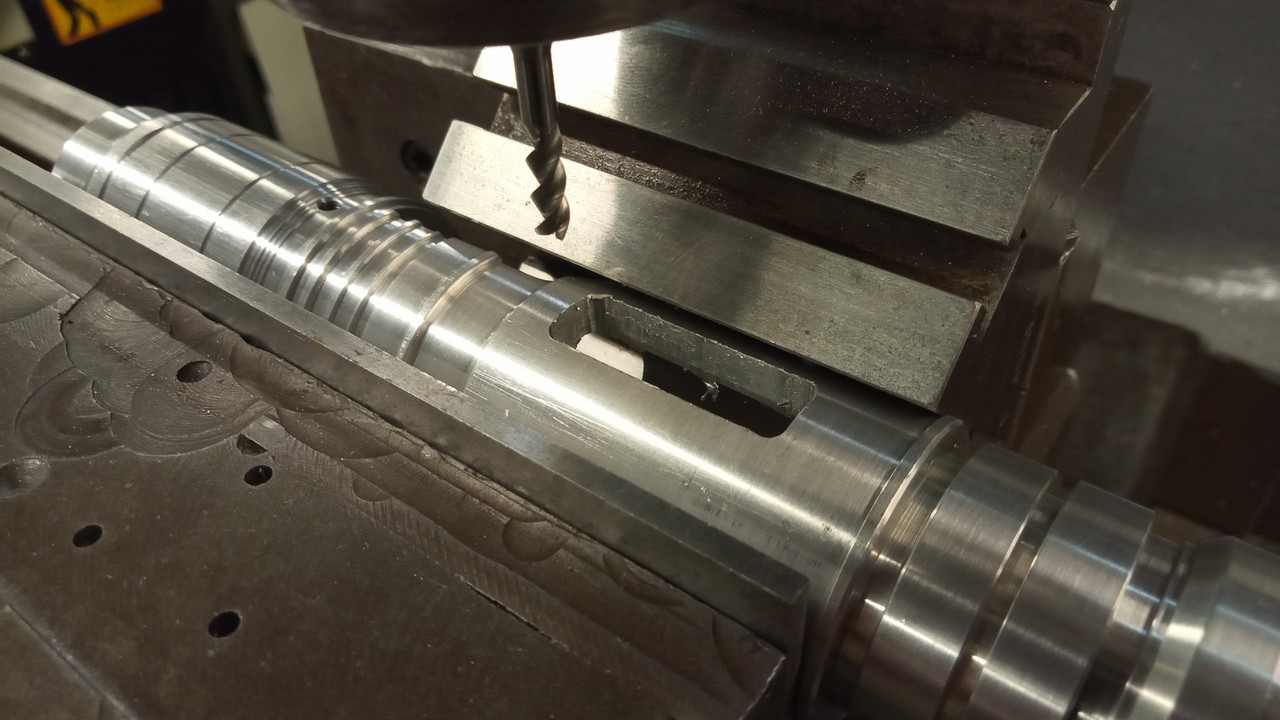
I now also discovered the highly-stable joy of using V-blocks to clamp cylindrical objects properly into the miller's vice!😁 Game changer!Here's the proof,while milling slots for the sights & spine into the main hilt body:

Invaluable setup for thread tapping retention screw holes also:
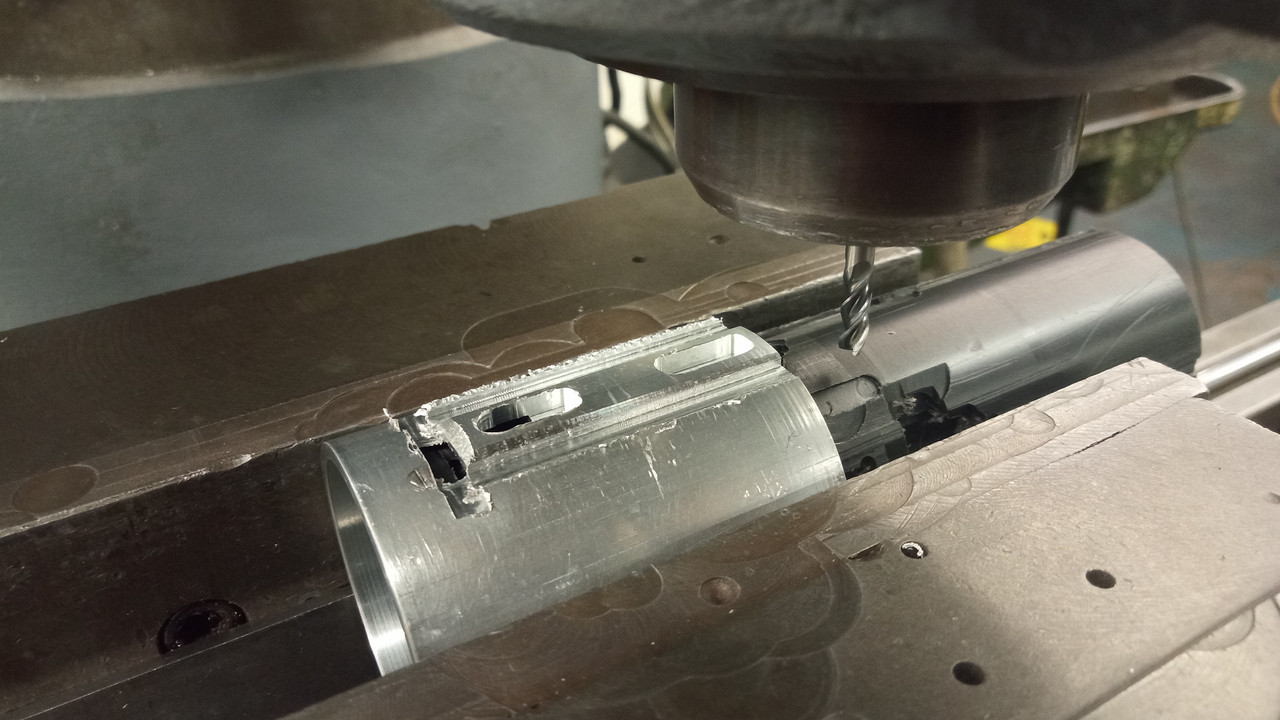
I next tackled milling the necessary slot to hold the switch box.Heart in mouth once more,as milling through holes in a largely successful hilt becomes geometrically more scary with every new hole you attempt,ie,please don't mess this up...🤞🏻🙄
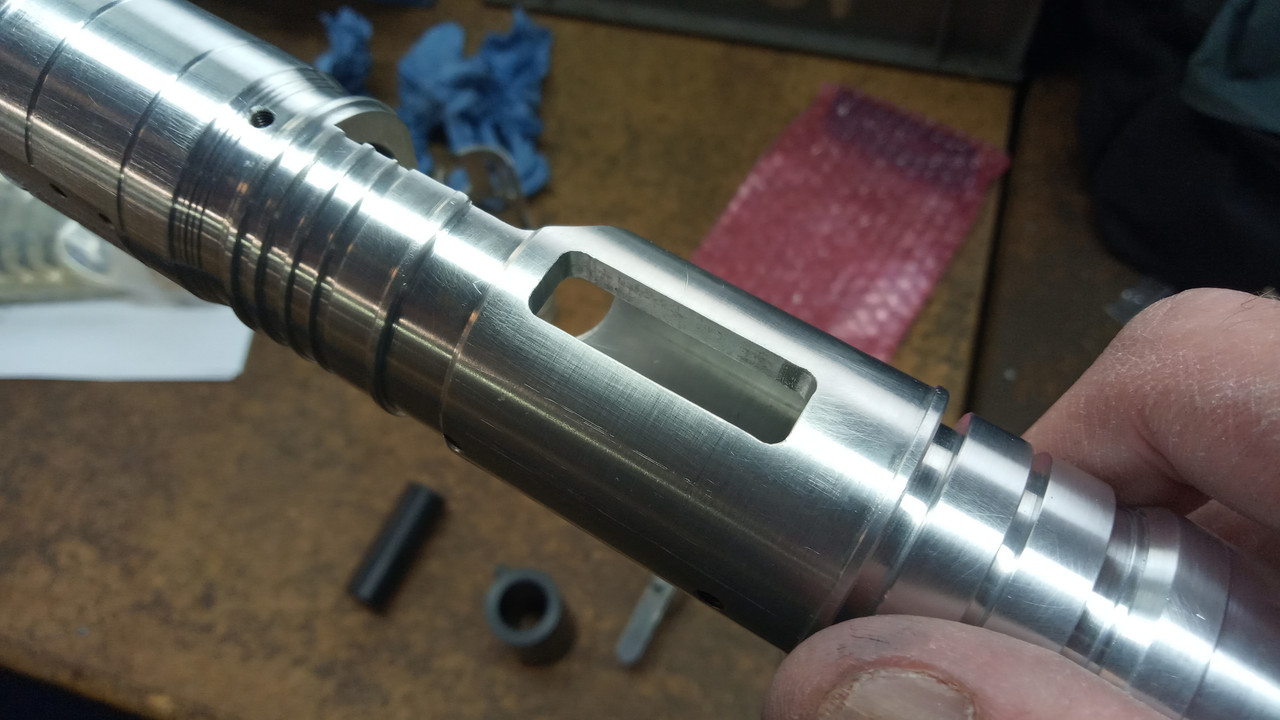
Success.At this point I decided on Delrin as my material of choice for the internals/electronic mounts.We do have a 3D printer at work,but that was a whole other skill set at this point & I felt I would gain more mechanical experience by just making my own.
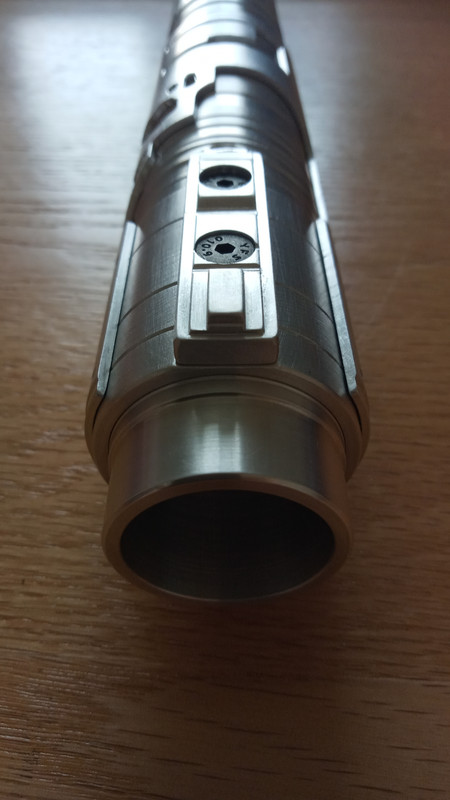
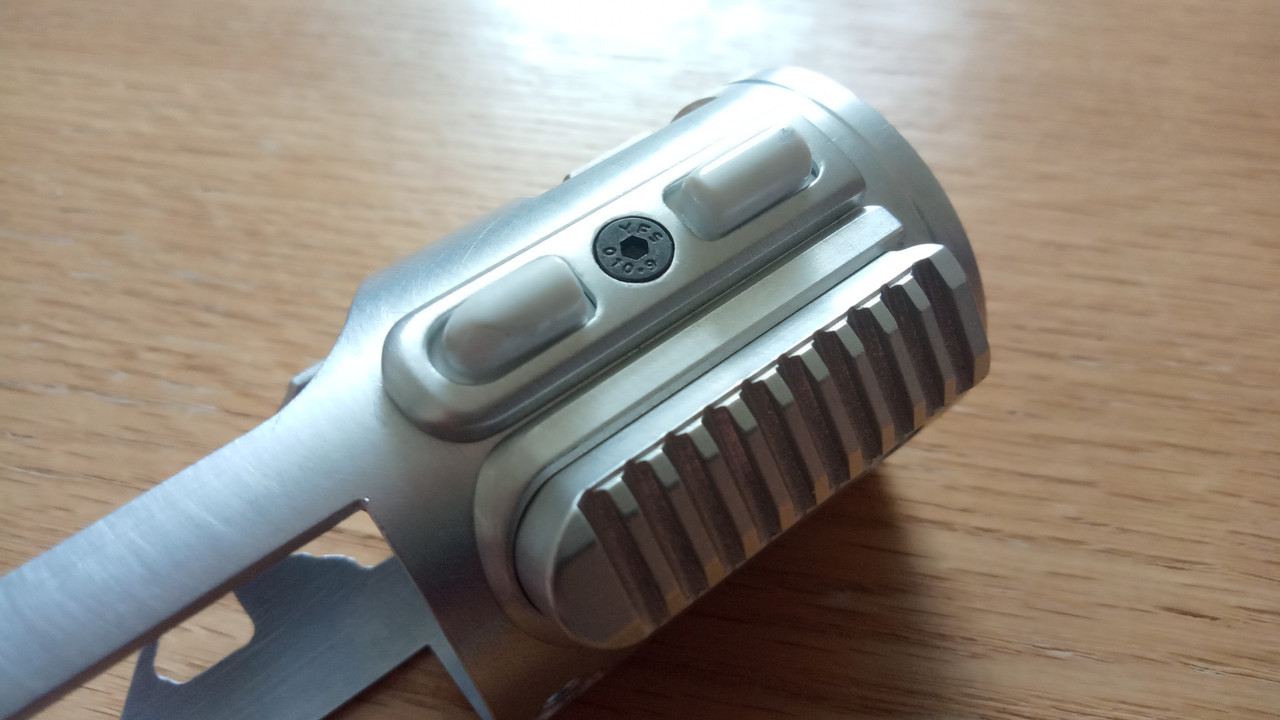
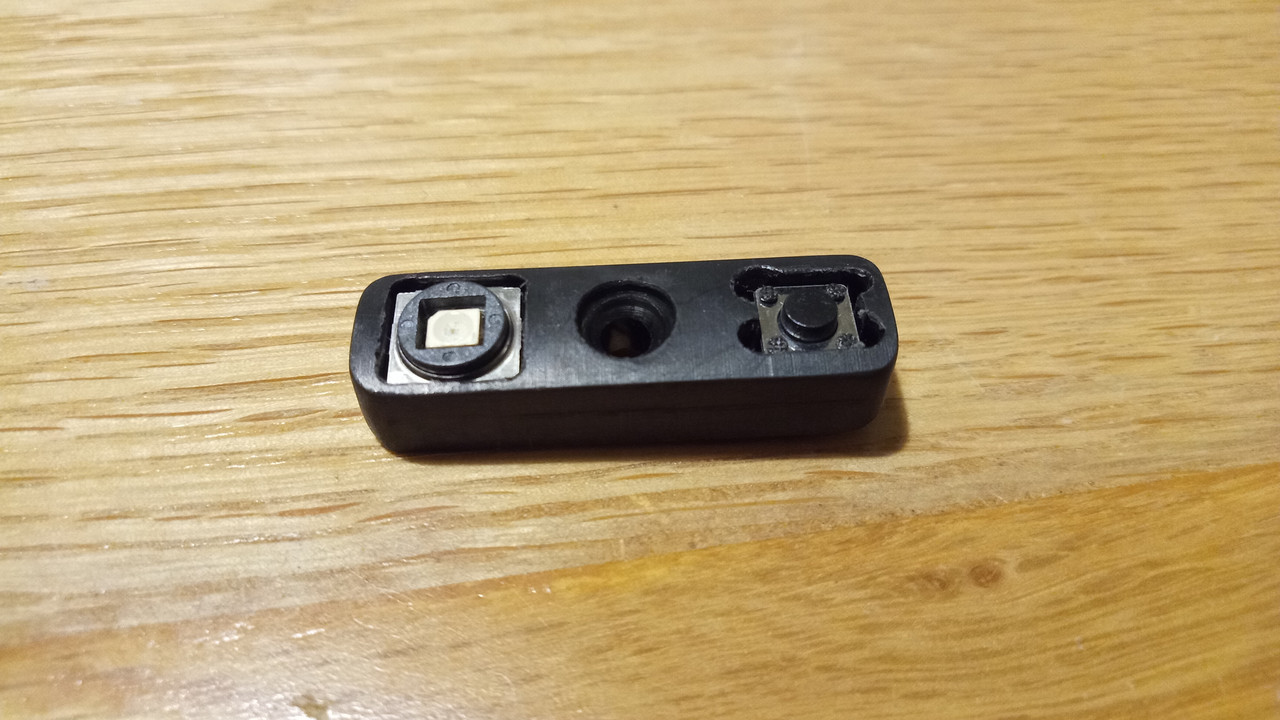
So I sourced a gorgeous blue illuminated momentary switch from JQ Sabers for the power button,a standard clicky 6x6x4mm momentary for the aux,& carefully milled a small Delrin box to fit the slot in the hilt:
& here are the switches test fitted in place:
This box mounts onto a vented Delrin chassis insert I came up with,which will sit permanently in the mid/forward section of the hilt,house all my wires,& also hold a GX16 connector that I will be using to attach/detach the main chassis (more on this another time,much still to do as regards the chassis system).
I remade what was now v4 of the pommel cap at this point:

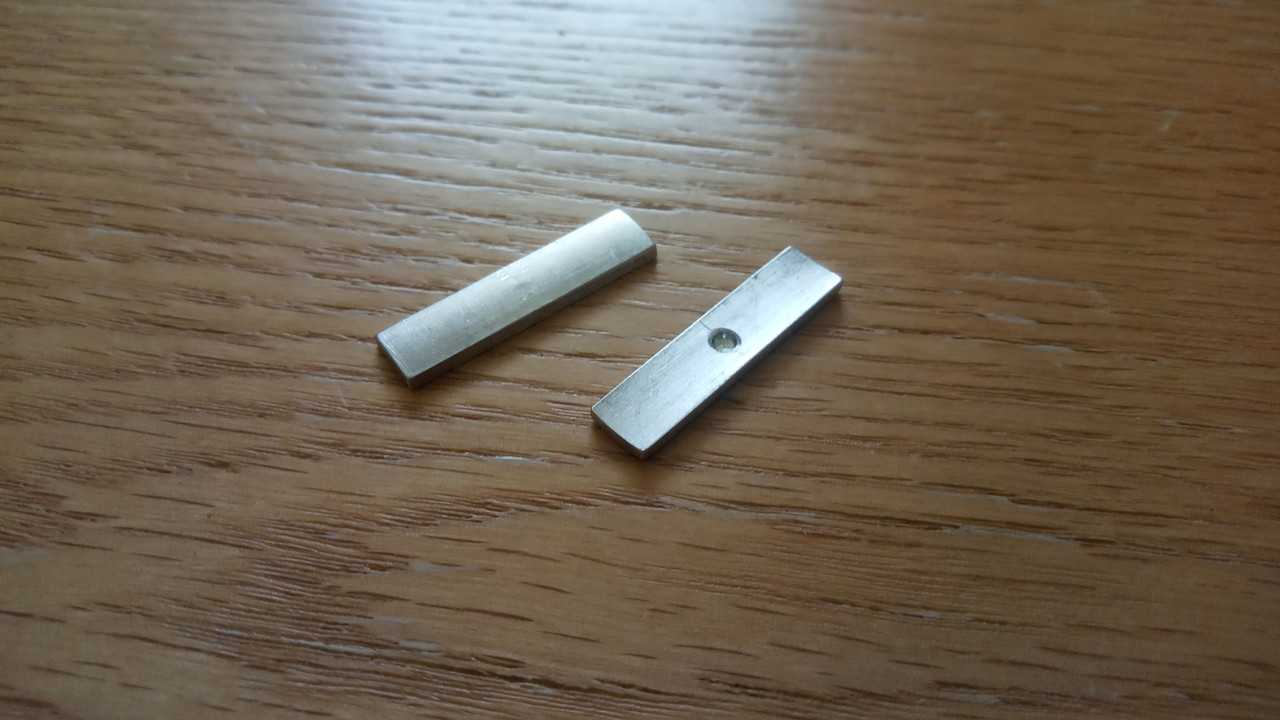
I also made an insert that will be the red visible section inside the rear cutouts of the JK; I won't waste space reposting that here,as I documented its process over on our Small Machining pages.
Felt like I was getting somewhere at last.The timeframe for this whole build is a little stretched & garbled to me now,I did begin it in March 2020; so any apparent inconsistencies in the narrative are my bad- sometimes you just hit a wall on a project & have to leave it for a while,etc etc.
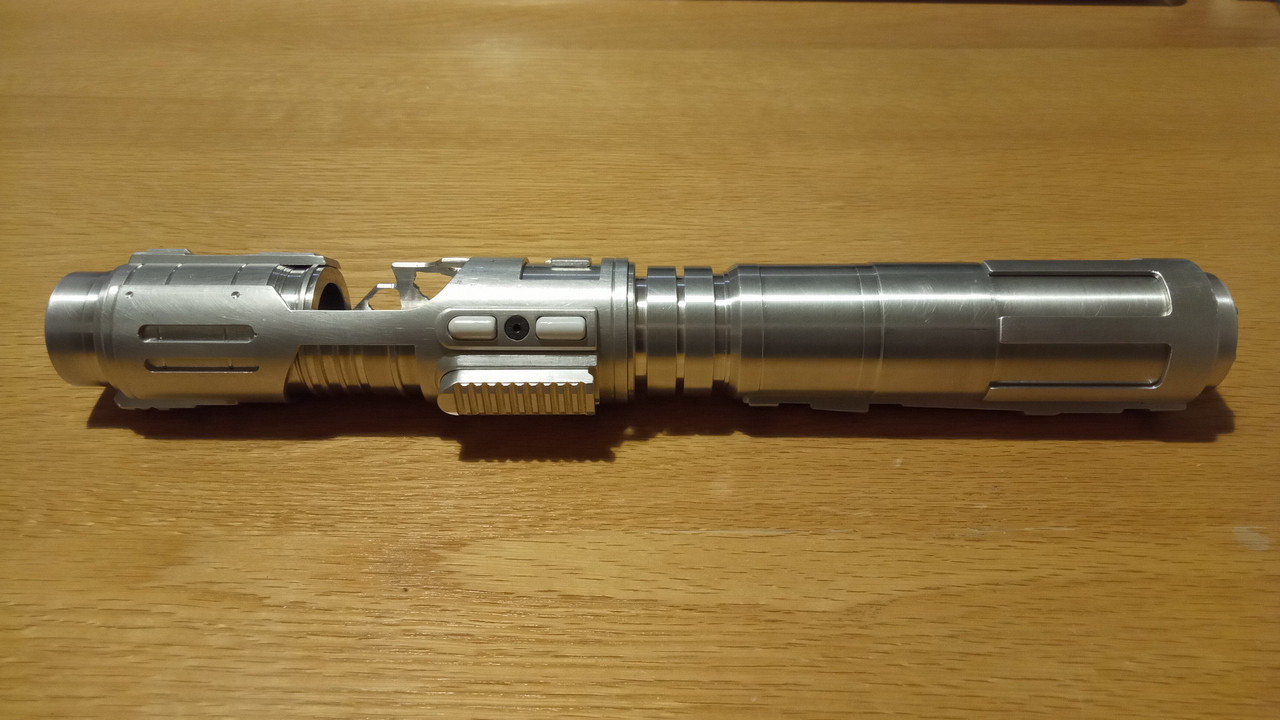
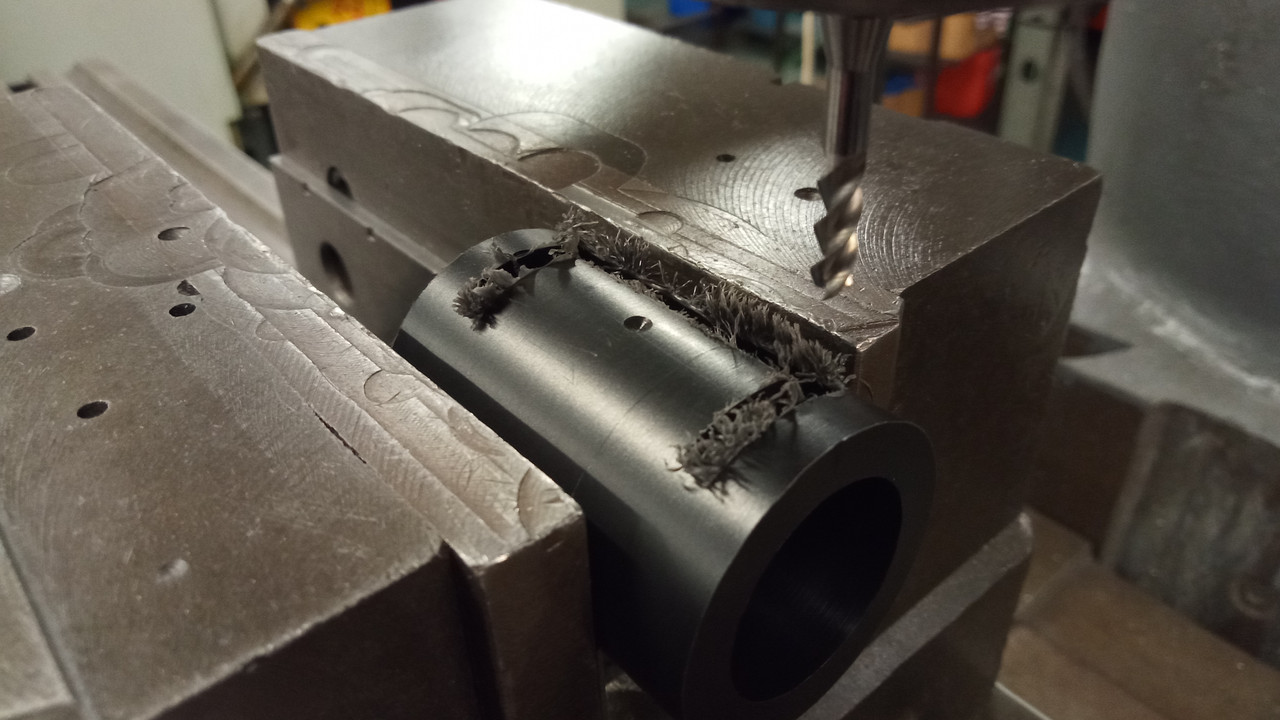
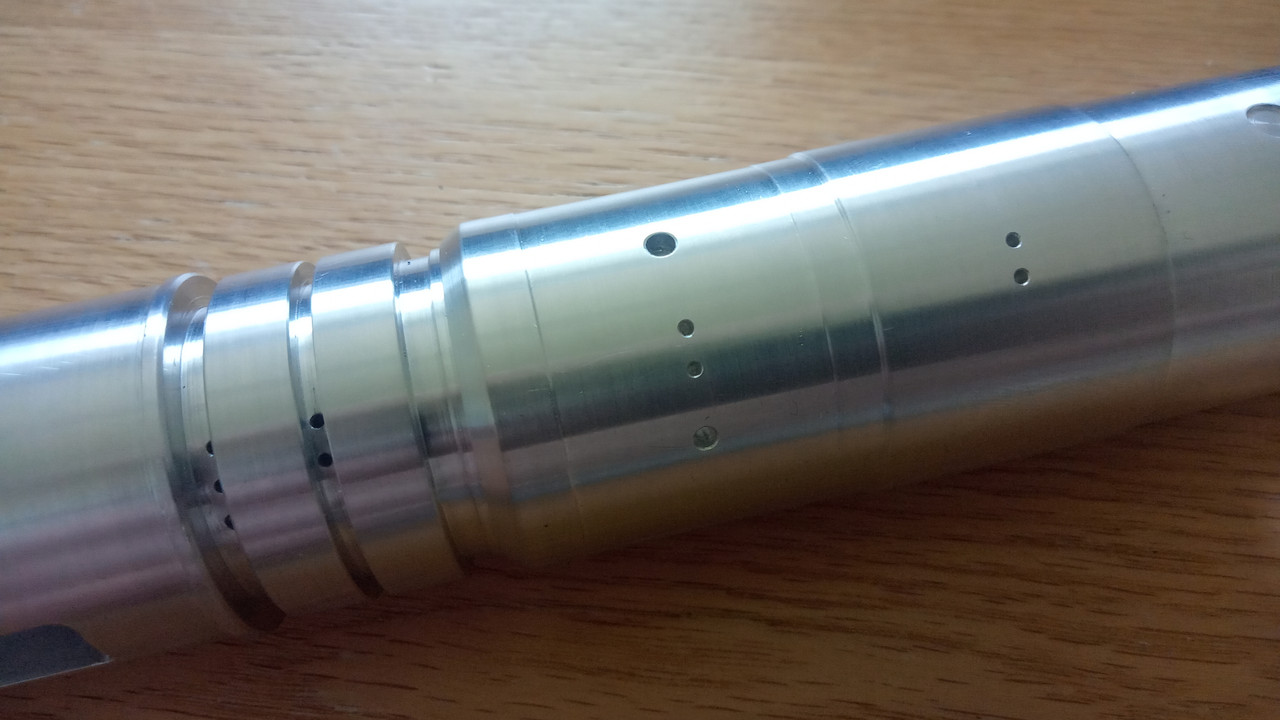
As far as the main hilt went though,I felt I was getting close.I now began adding greeblie details; a terminal cutout for the red wire,holes for the wire guides (I'm making them out of beefy paper clips- easy),& some detailing on the "blind" side of the saber (as in,the side facing away from us in the concept painting- we'll never see it,so I feel complete creative freedom on those decisions is justified!):
Incidentally,I made the small side "tabs" that are present on the rear grip section with my now usual ID/OD trick.Machining them as one part of the main hilt would have been ideal,but I feel probably a CNC op,& I wanted to stick with my own manual labour for this build (masochist that I am):
Small guide pin holes were also drilled so that I can ensure their location & orientation during final assembly- will have to compromise my own principle & epoxy them on I think,as I didn't want to add too many more external retention screws.
Test fit:
So I was now at a stage where I felt I could start mulling over finished processes.I'd always had it in mind to get the saber anodised before starting weathering etc,& luckily my company deals with a long established anodisers' over in Manchester; I've been assured by management that they'll be most open to tackling the job,so watch this space on that score.
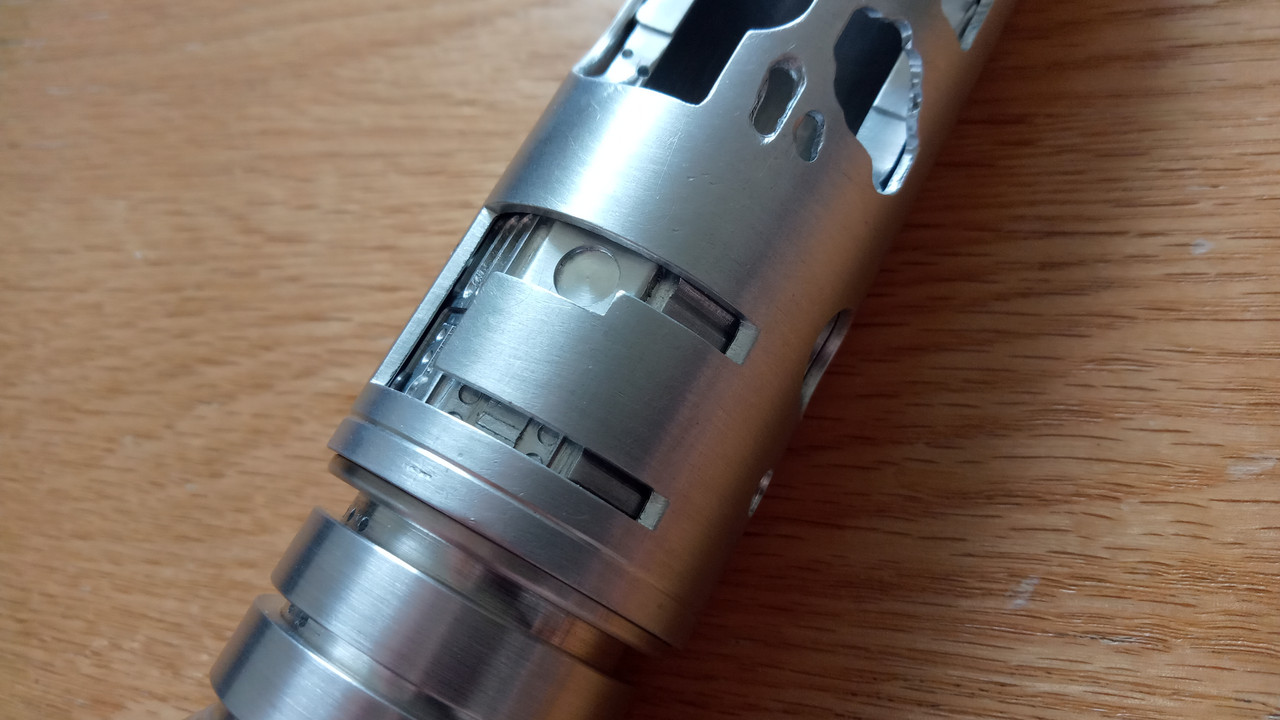
So at this point,I was about to pull the trigger on talking to the anodisers.But I had a last minute mental splinter bugging me... the hilt just looked too plain where the cutaway detailing in the shroud sits,there was no depth to it.
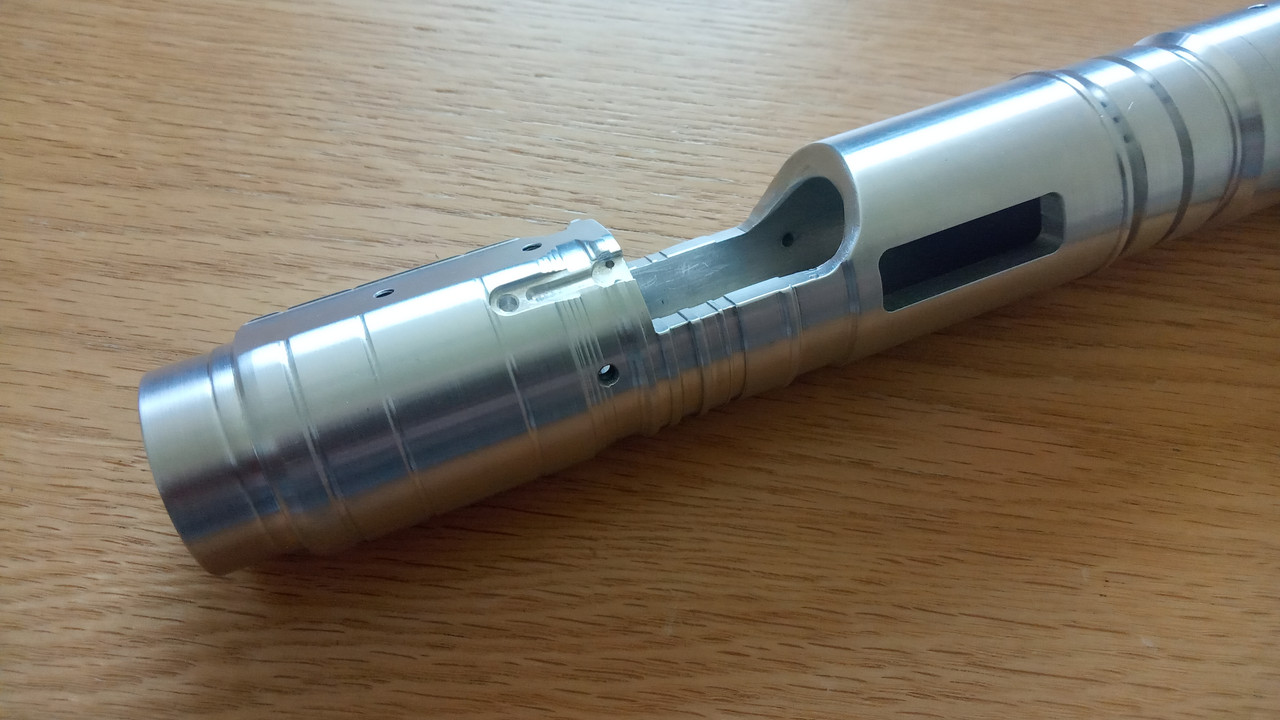
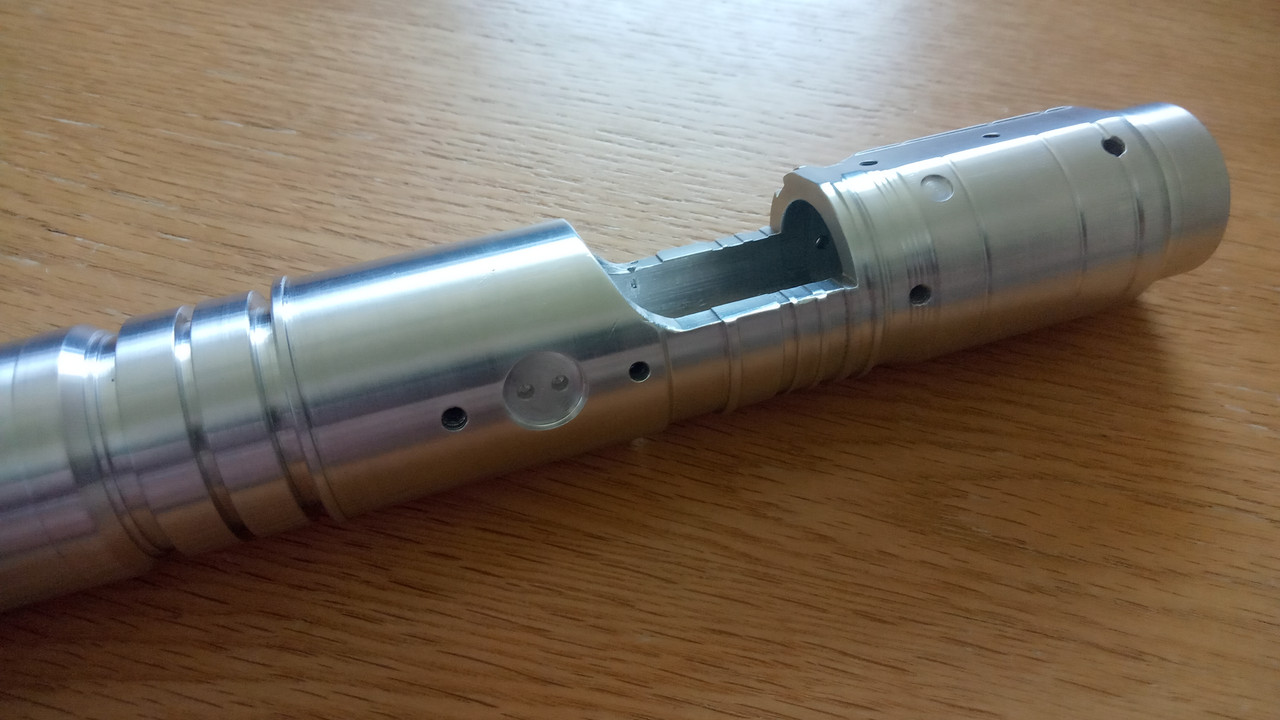
So I decided to make a nod to the crossguard to which this design was the forerunner,& add visible engine detailing.Which I milled just today,in fact:
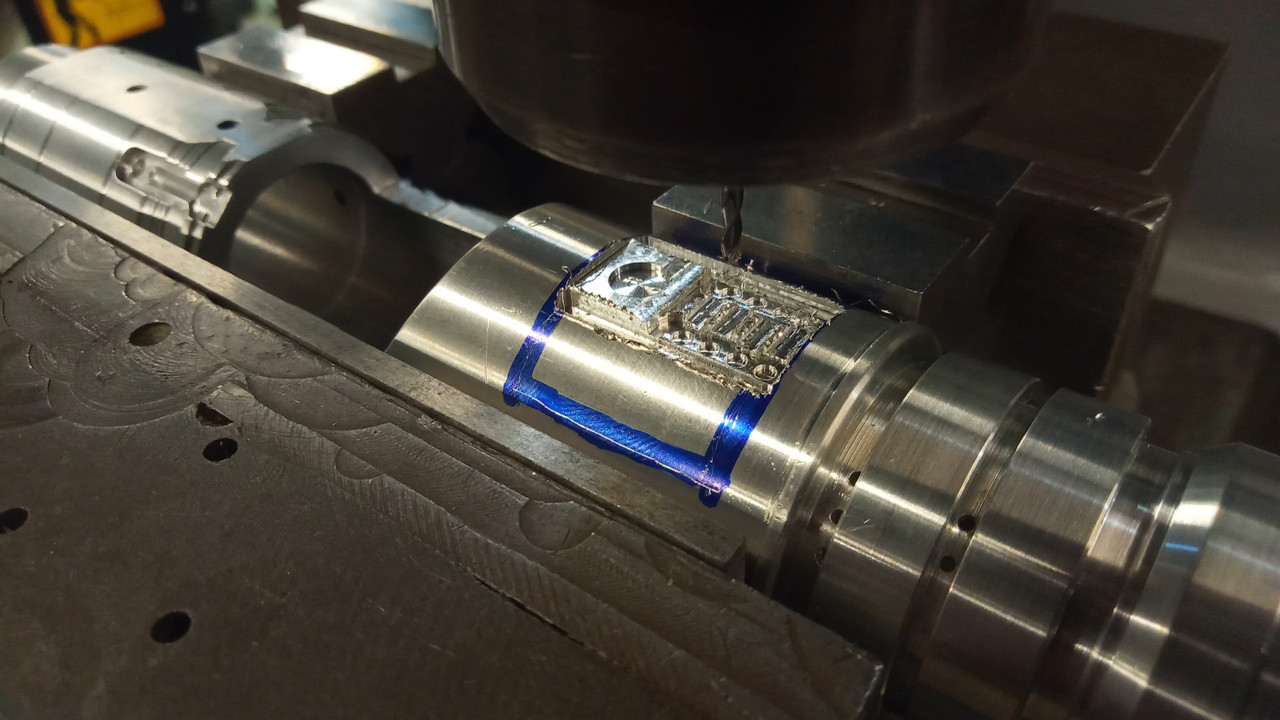
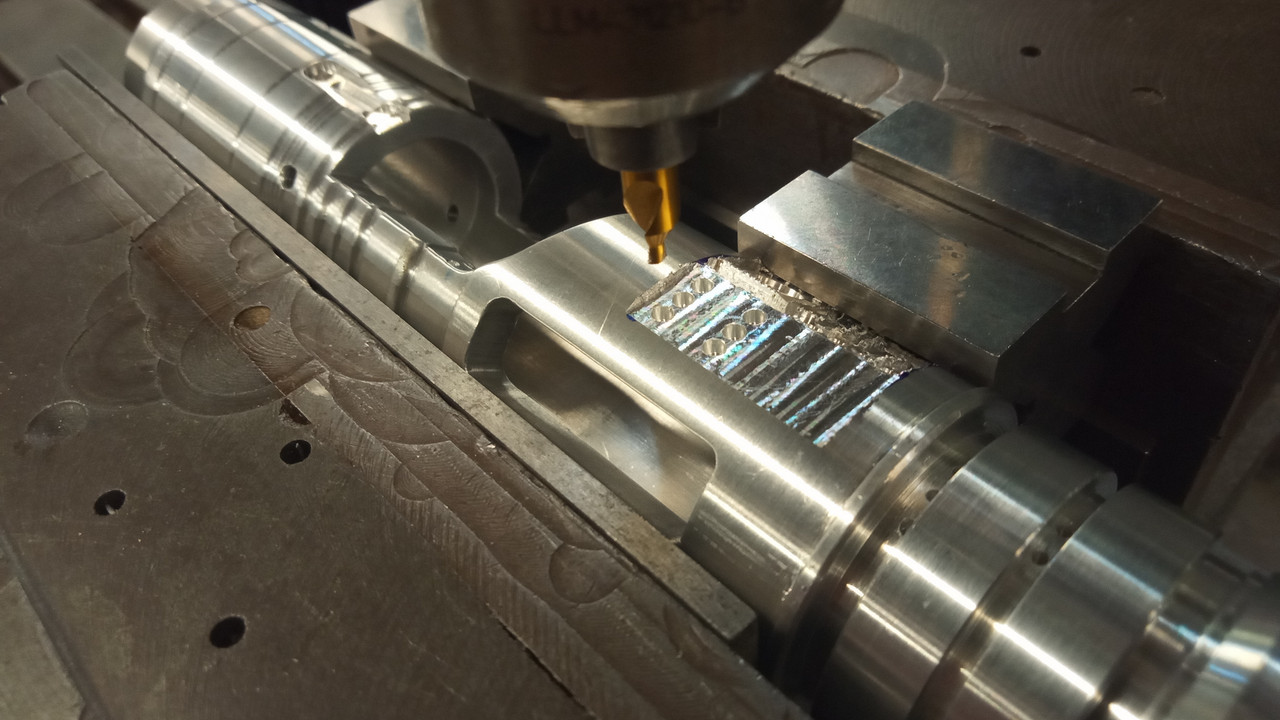

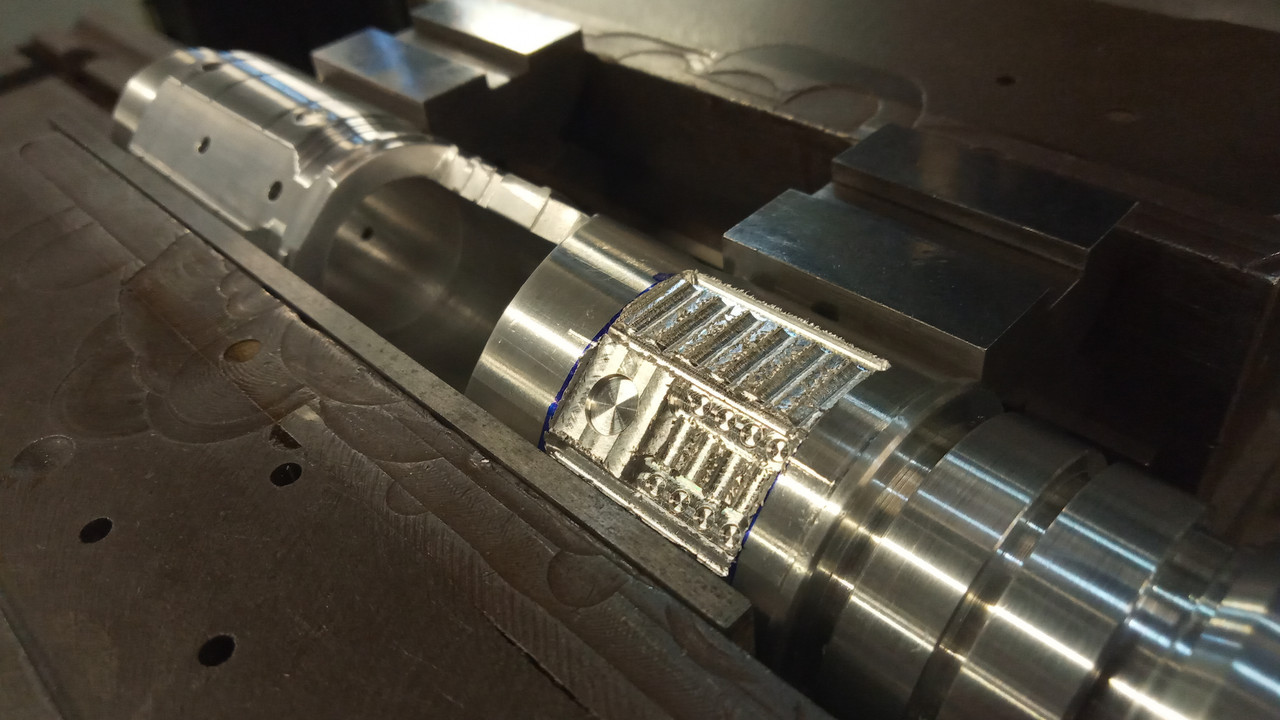
I figured that not too much of the detailing would be visible once the shroud was in place over it,but thanks to one of those happy little accidents...
I was wrong:

So that,folks,is about where I'm at.It's been a xxx of a learning curve,at one point a very dangerous one,but using machines to make the shape you want out of nothing but a chunk of raw material has a certain addictive,satisfying glow about it.
I don't know if this will be a first saber in a series of builds,or whether I'll be a one-&-done,because at times this build has very nearly defeated me.But,the finishing line would seem to be hoving into view,so can do no less than see it through now!💪🏻
If you've made it this far through my first build log,congrats to you...😅 Sorry for any disjointed rambling,but that's the nature & process of the scratch build sometimes,I'm realising.Cheers for looking,everybody!👍🏻
Guy.
 Topic: Guylo Ren's first saber- part 1 (Read 1073 times)